Sometimes in every online merchant’s life, it comes time to close the doors of their Shopify online store.
Shutting down an online store on shopify can be a herculean task that takes far too much time and energy – resources you should be applying to your next big thing.
The good news is that canceling your Shopify store is incredibly straightforward. It’s nowhere near as difficult as deleting certain other online accounts that require Ph.D. level expertise to do so.
So let’s get to it and show you how to close up shop on Shopify.
Items of Note Before Closing Your Store
Before we get into the steps of shutting down your online account with Shopify, there are a few things to know first.
- Closing a store on Shopify must be done manually, by you. The Shopify support team will not close the store for you.
- If your store has any outstanding or unpaid charges, Shopify will send you a final bill to settle your account.
- When you close your store with Shopify, you are also canceling your store’s account. This eliminates your access to your admin pages once the closure is complete. Be sure this is something you really want to do.
- If you cancel one store, you’ll have to start fresh with a new one. By fresh, we mean new store, new store name, new store account. Closing an online store means losing that store’s name to the void of the internet (okay, maybe just Shopify). If you close a store, you won’t have the ability to create a new store with the same name or URL, should you change your mind later on.
Before closing, you’ll also need to resolve some general housekeeping issues.
- If your store included any third-party apps, uninstall them and cancel those accounts to avoid any unnecessary bills after shutting down.
- If you acquired a custom domain from Shopify, transfer it to your new provider.
- If your domain was acquired from a third-party, then you’ll want to remove it. Otherwise, you might lose the ability to use it elsewhere for another store.
- If you transfer your domain to a new platform, understand that Shopify’s HTTP Strict Transfer Security (HSTS) remains effective for 90 days after your store’s closure. This won’t be an issue should the new platform be HTTPS-enabled. If it isn’t, then any visitors will see a message that your store is insecure and not to be trusted or that your certificate is not valid.
Closing Your Shopify Store
With those finer points out of the way, it’s time to close your store.
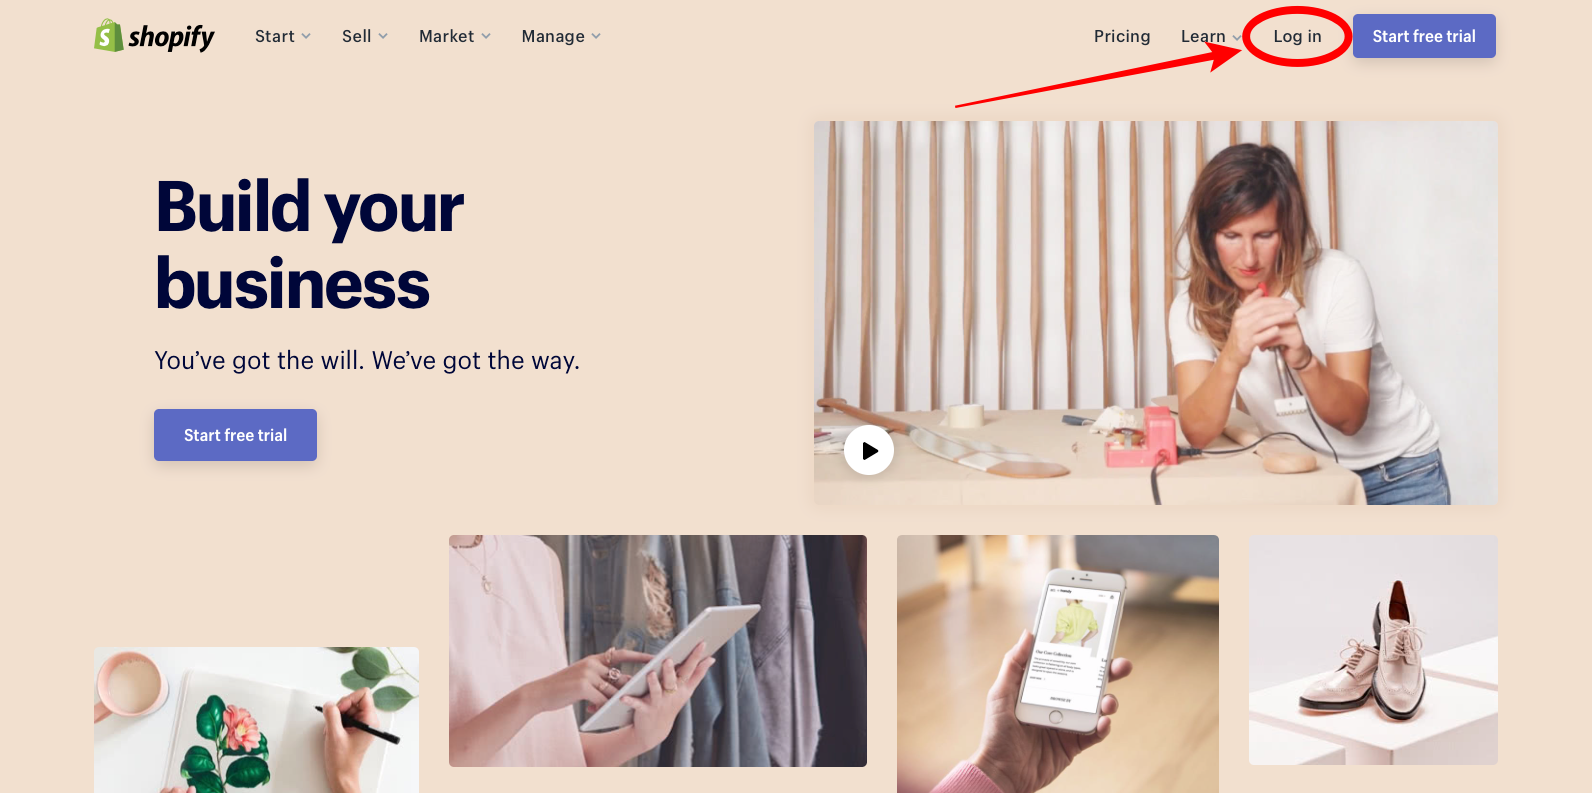
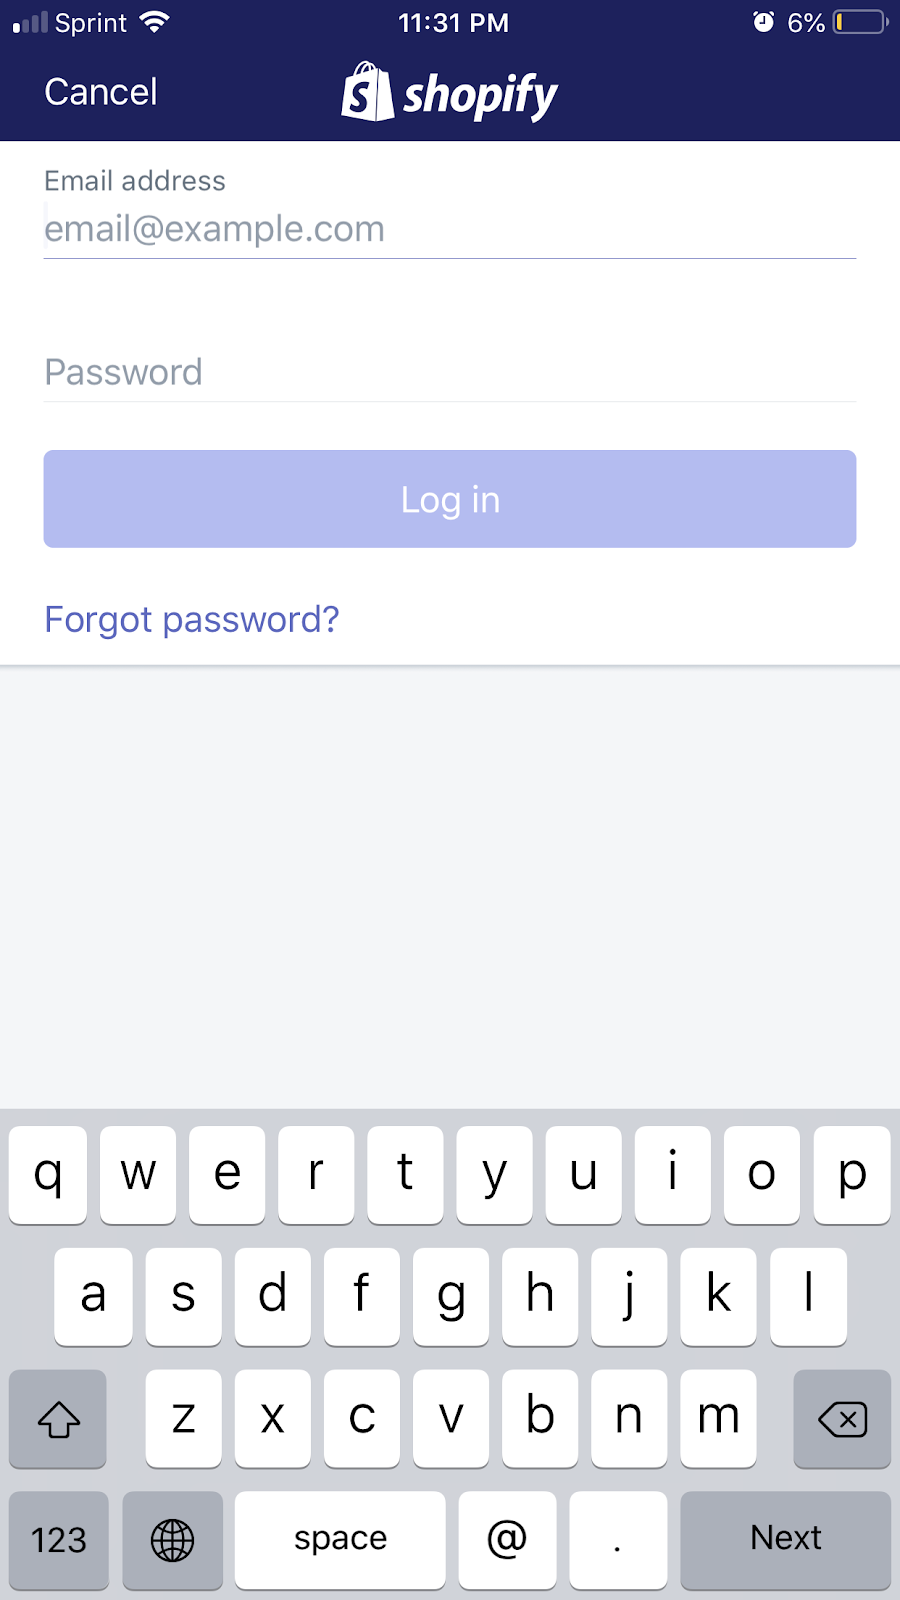
Step 1: Log in to your store’s account.
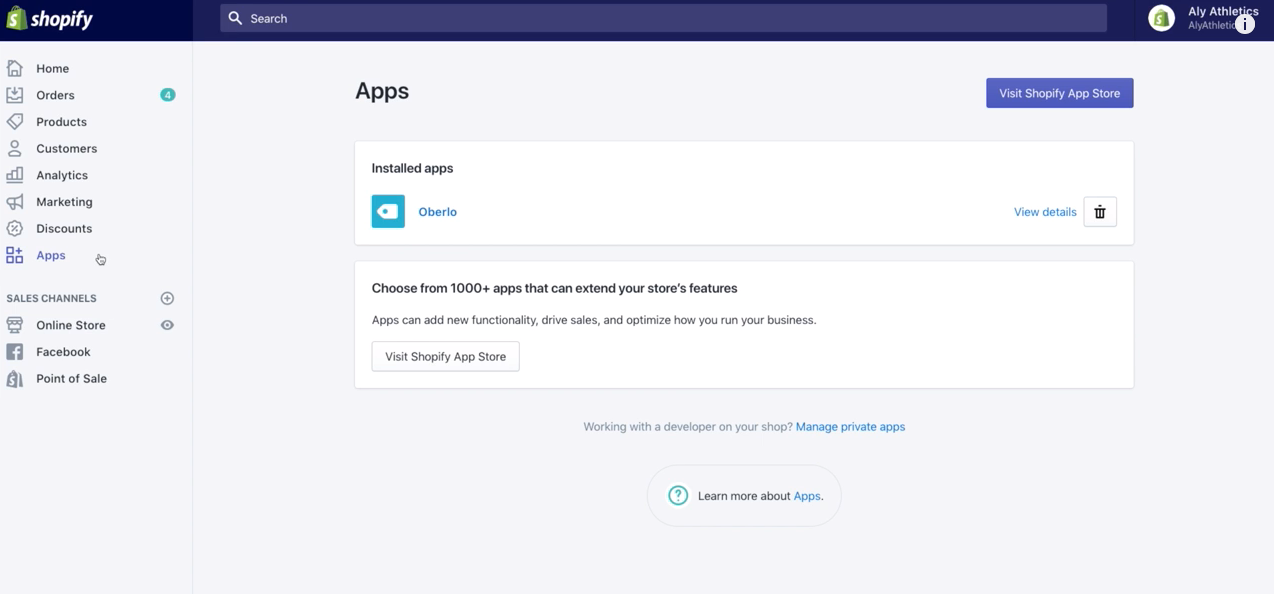
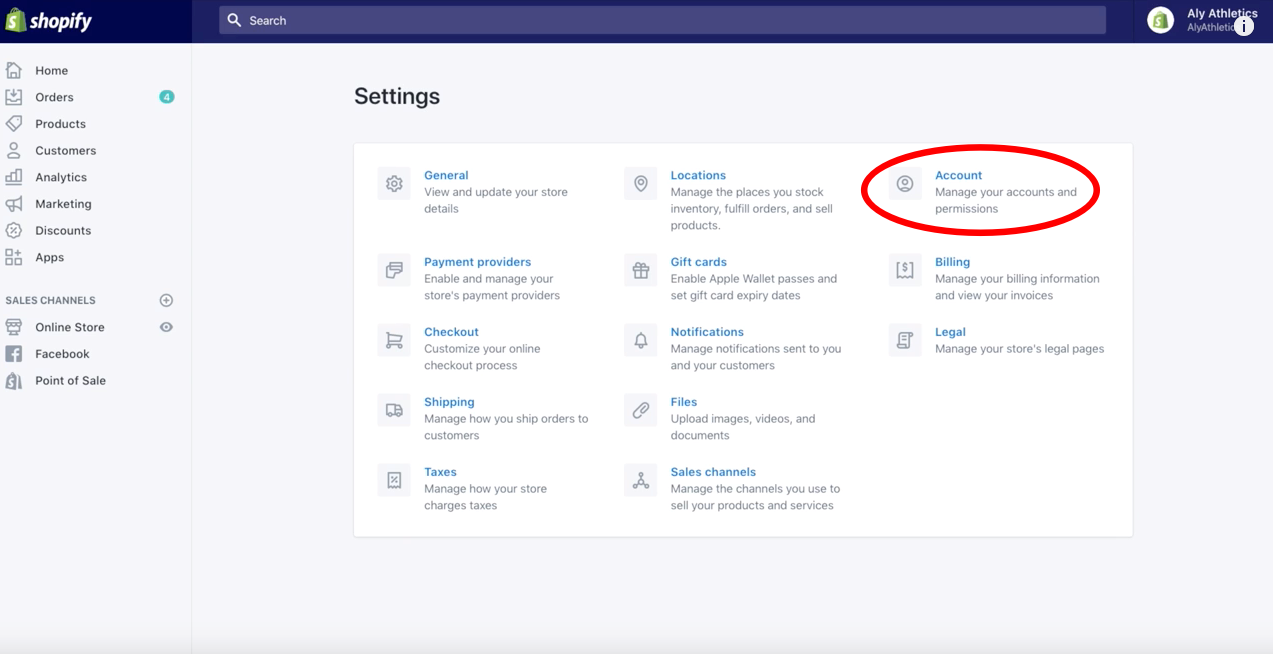
Step 2: From your main admin page head to Settings > Account.

For mobile users: From the Shopify app, select Store > Settings. Then under Store Settings, select Account.
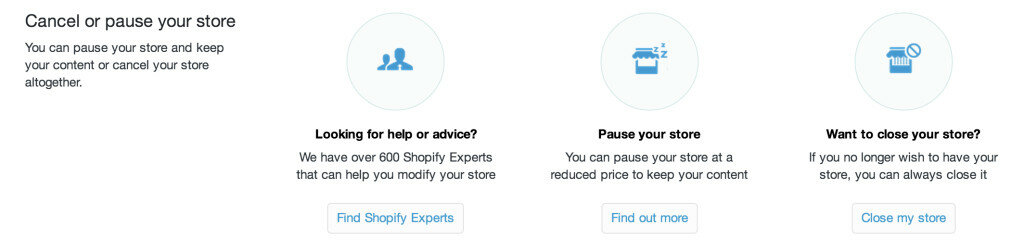
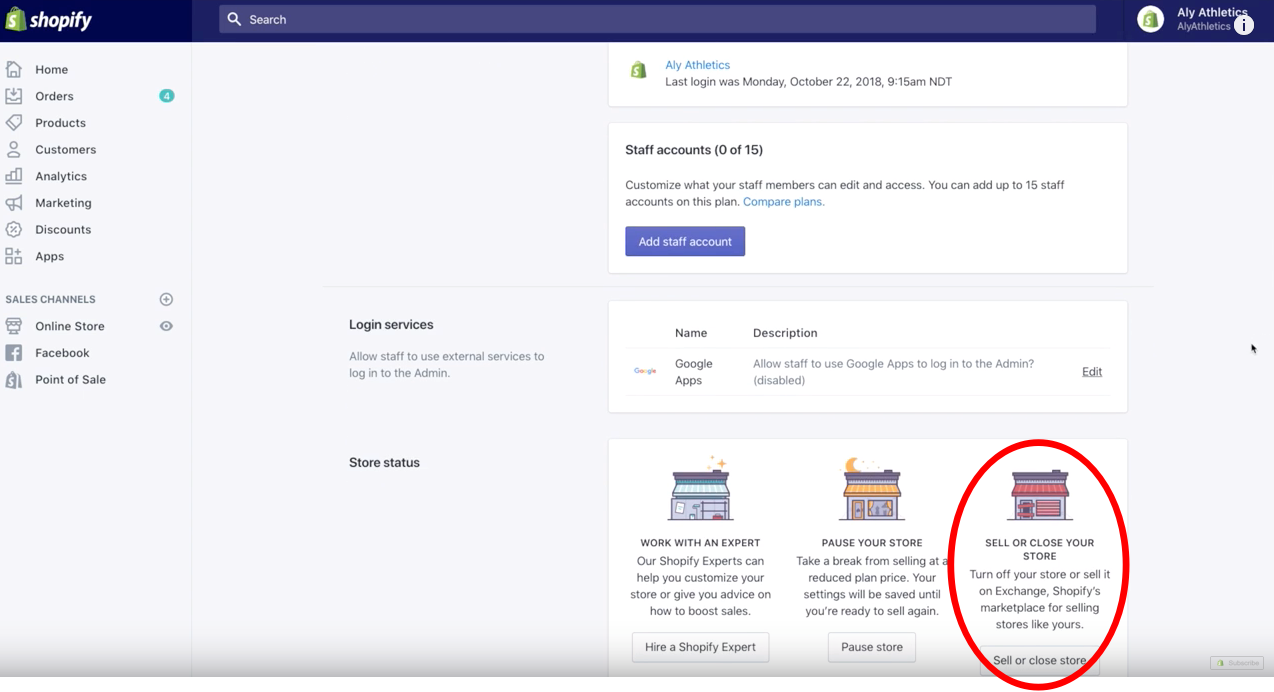
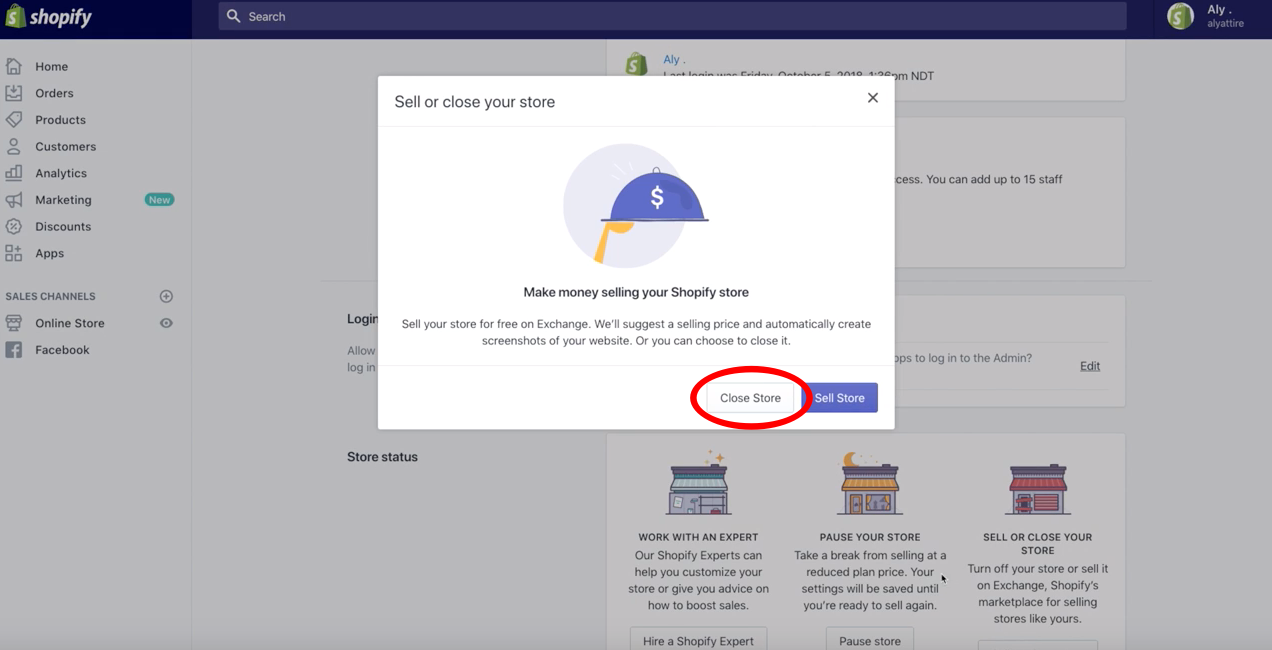
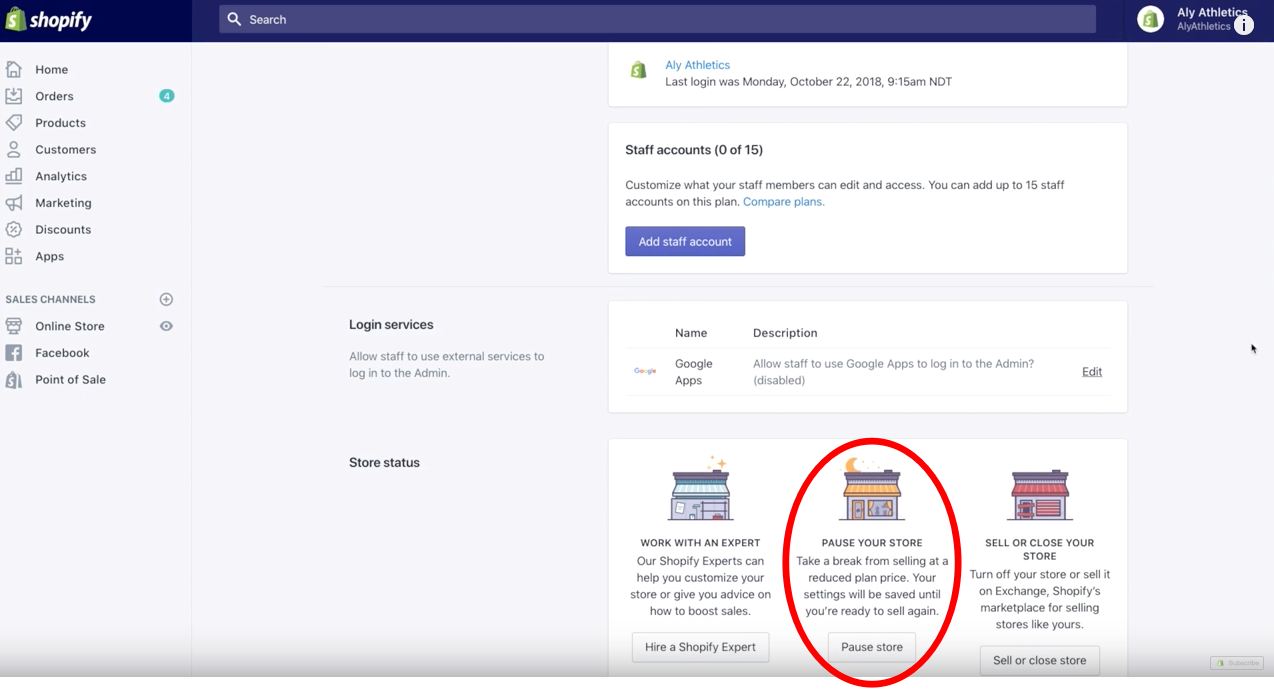
Step 3: Scroll to the section at the bottom of the page that says Store Status and click Sell or Close Store.
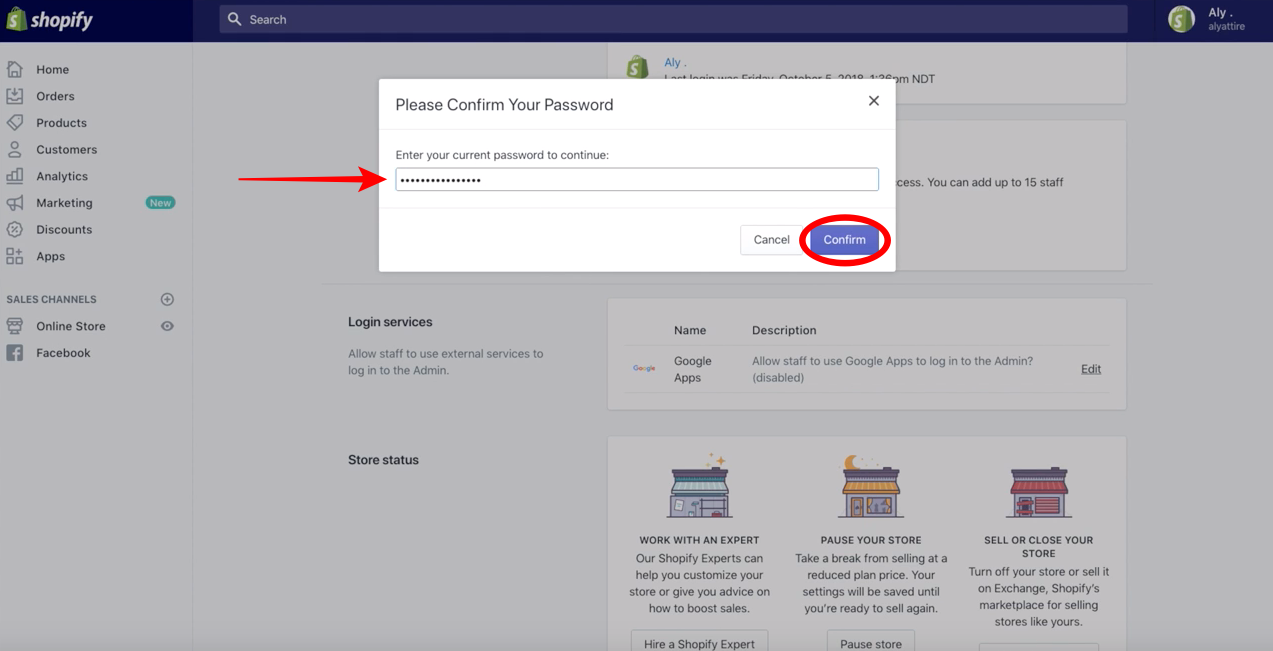
Step 4: In the popup box, click Close Store, and then enter your password when prompted.
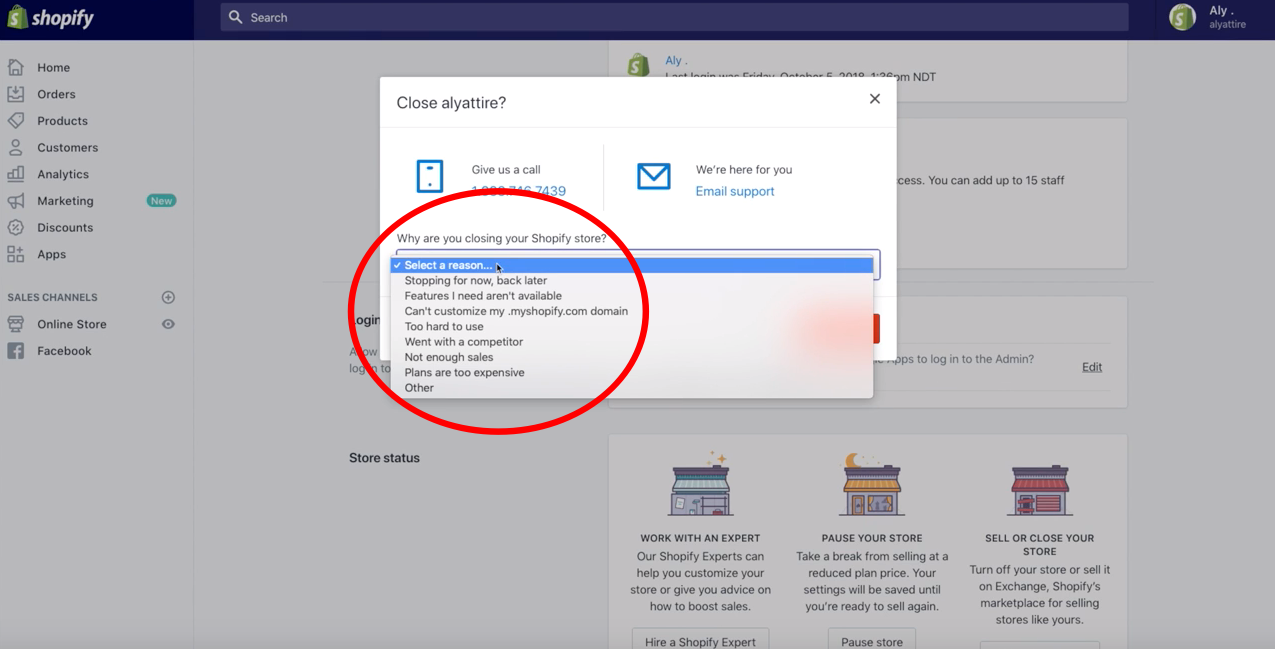
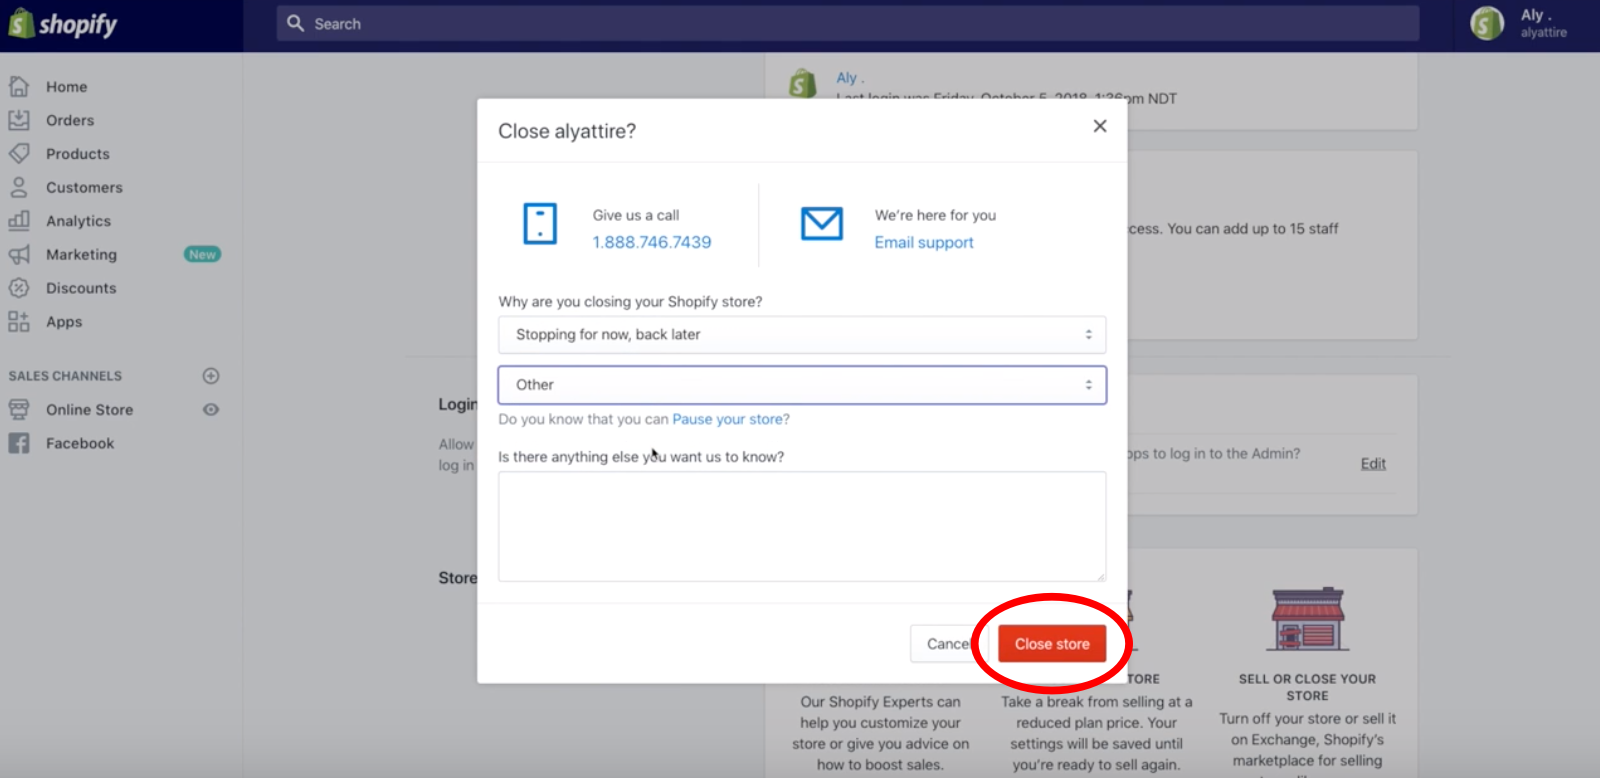
Step 5: Shopify will request for you to select a reason why you are closing the store and to provide any feedback (optional). Once you’re done, click Close Store.
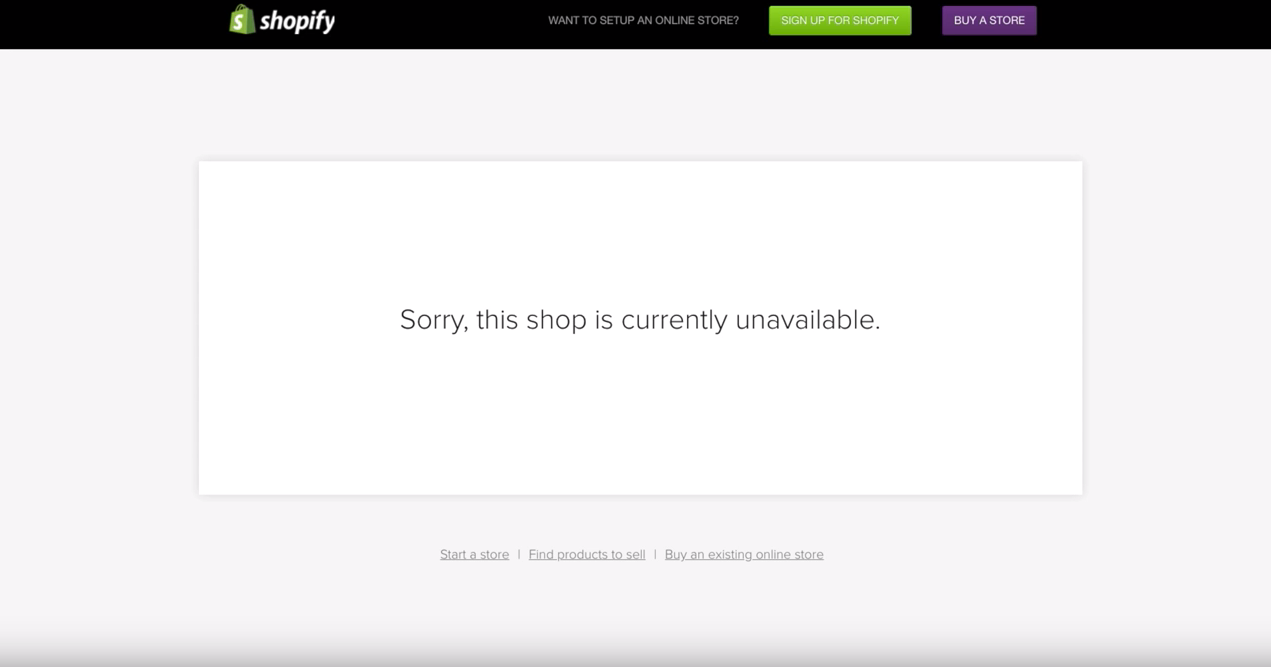
That’s it – your store is officially closed. To confirm your store’s closure, visit your shop’s URL and verify that the store no longer shows up.
If You Change Your Mind
Now, if you regret boarding up the online window that was your store, or you have a change of heart for any other reason, Shopify does give you 30 days to reopen it. Within this 30-day period, Shopify guarantees that all of your store’s vitals will remain as is – including your it’s data and configuration info. After the 30 days, all bets are off.
Another Option
Perhaps you’re on the fence about completely shutting things down and want to think it over without totally calling it quits.
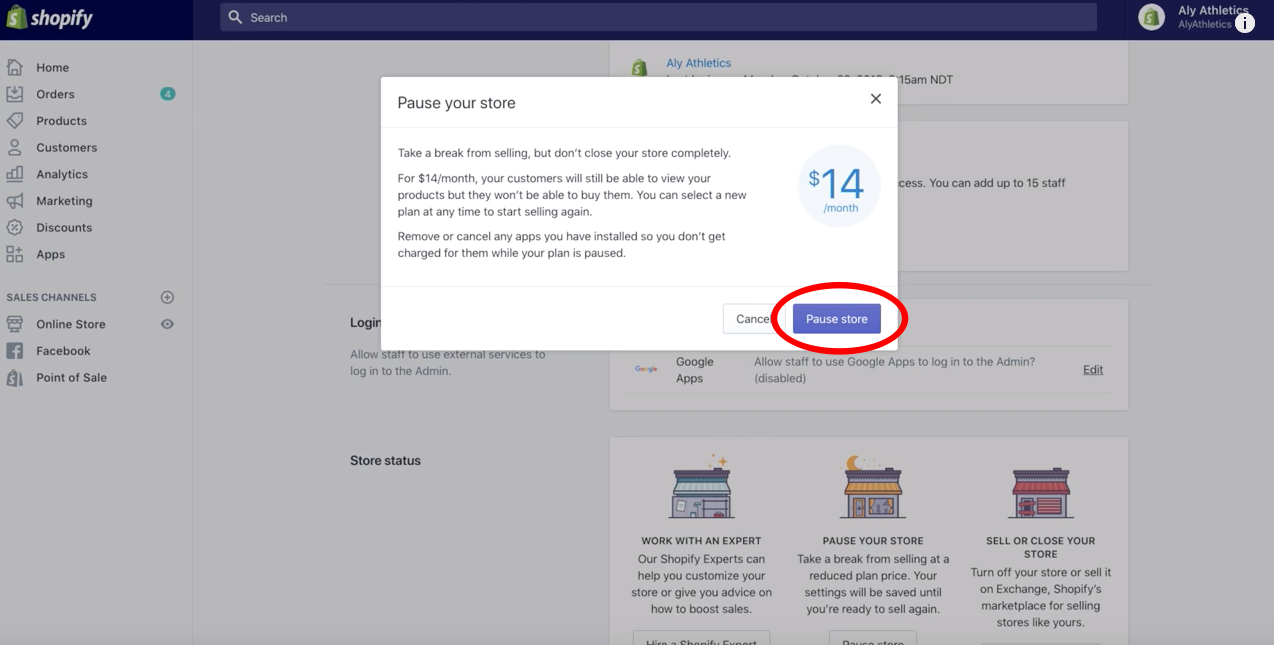
Well, Shopify does have a pause option that allows you to put the brakes on your store at a reduced fee of $14 per month (also called their Dormant plan).
Pausing your store is, of course, a bit different from canceling it entirely, but there remain a few things to be aware of when taking this approach.
- Pausing your store effectively keeps visitors from using the online checkout, even as your store remains active. They can still surf the store and look at products but are unable to make purchases.
- You still have admin access when your store is paused and retain the ability to edit your store as necessary.
- If you have outstanding charges on your account, you will be prompted to resolve those before hitting the pause button.
- Similar to closing your store, if you have third-party apps running (specifically ones you pay for) make sure those are canceled or paused as well to avoid charges while your store’s activity is limited.
Pausing Your Shopify Store
Let’s just put things on hold for a bit.
Step 1: Log in to your store’s account.

Step 2: From your main admin page head to Settings > Account.
For mobile users: From the Shopify app, select Store > Settings. Then under Store Settings, select Account.

Step 3: Scroll to the Store Status section and click Pause Your Store.
To unpause your store:
Step 1: Log in to your store’s account.
Step 2: From your main admin page head to Settings > Account.
For mobile users: From the Shopify app, select Store > Settings. Then under Store Settings, select Account.
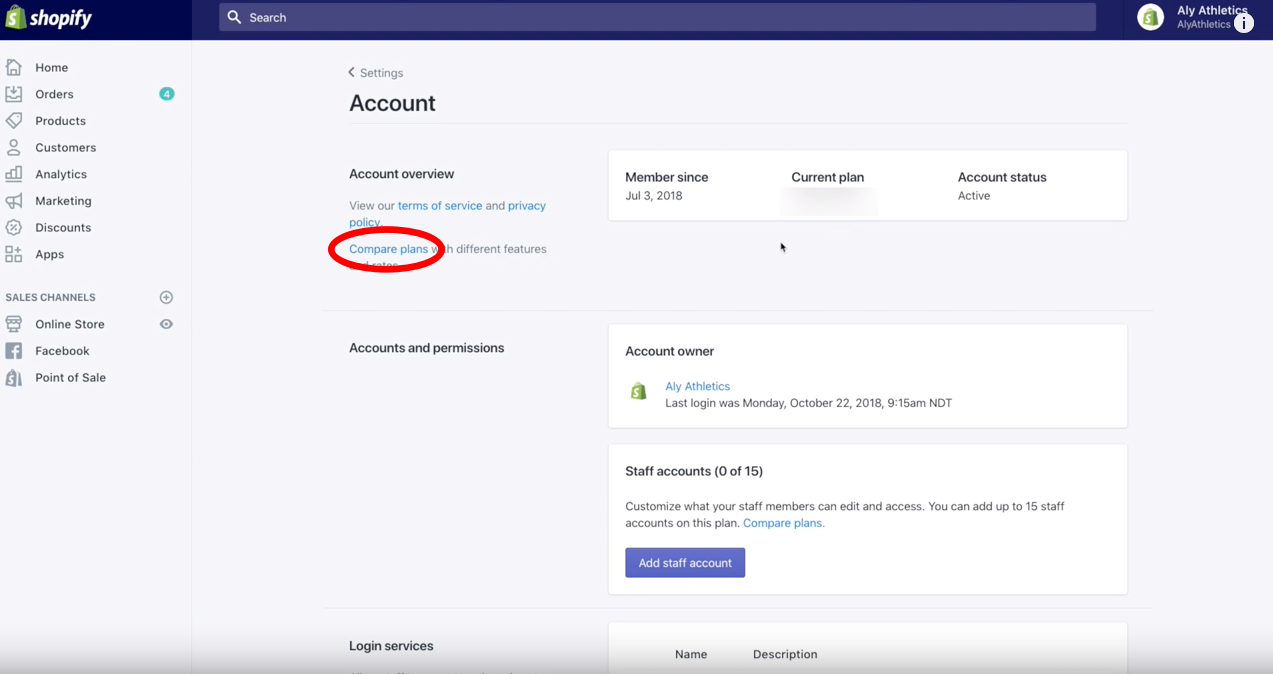
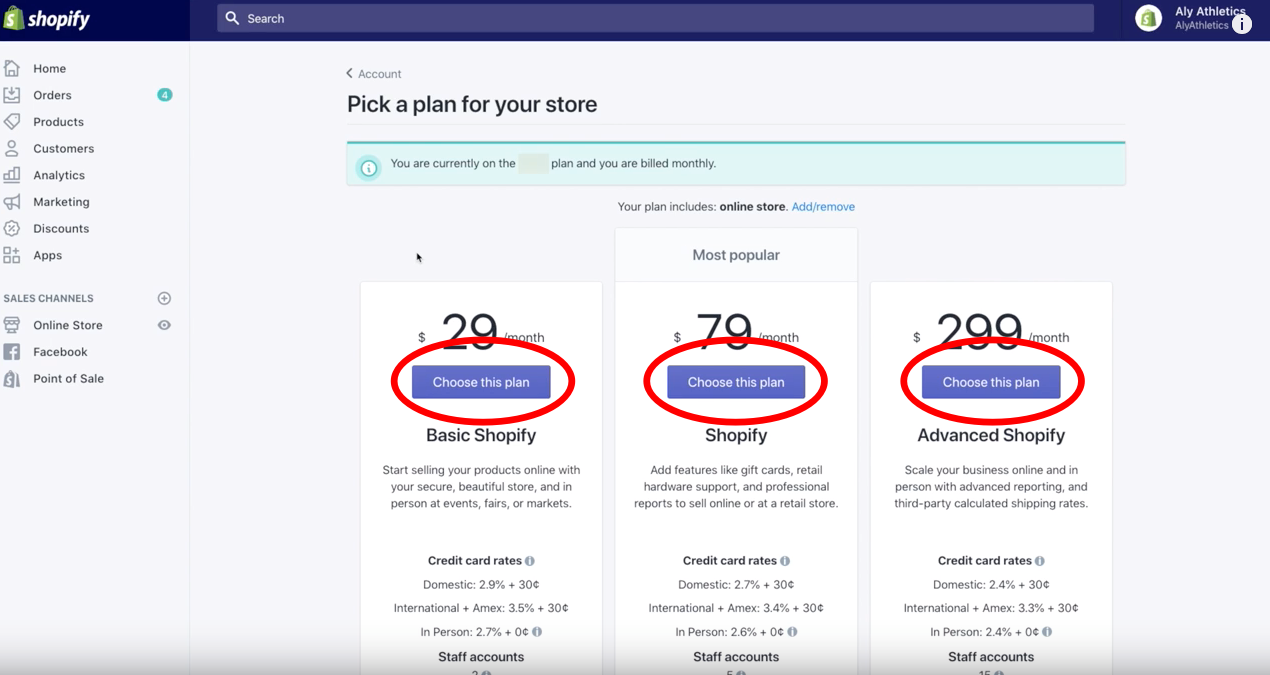
Step 3: At this point, click Compare Plans, as your store does not automatically revert to your prior pricing plan before pausing the account.
Step 4: Select a plan. Once you do so, your store is unpaused and running as usual again.
Super simple, right? Whether closing up your store or simply taking a break from it, Shopify makes it easy to do both.