
So, you’ve registered your Shopify account and set up a Shopify store!
It’s time to start selling and listing products to your online store. Whether you create or buy your products from a supplier, you want to showcase your Shopify products to your potential customers to maximize sales and boost profits.
As a beginner, knowing how to add products to Shopify is more than adding products, photos, titles, and descriptions. You will learn the best practices when adding Shopify products to maximize sales! You will learn the best practices when adding Shopify products to maximize sales! Keeping track of which listings perform best with the Shopify sales tracker can also guide you in refining titles, images, and descriptions for higher conversions.
When I started selling online, I encountered a few roadblocks and did not give much thought to adding products to my online store. I thought sales would flow seamlessly as long as my products were listed on the platform. But I was wrong, so I want to show you some helpful tips on how to add products to your shop to attract more customers.
Are you ready to add products to your Shopify store? Let’s get started!

Key Takeaways
- Go to the Shopify dashboard and add products with the essential product details, such as title and description.
- Add photos and videos to make your product listing stand out.
- Set a competitive price that maintains profitability and evaluates competition.
- Choose the correct category to make it easier for customers to find your listing.
- Optimize your product details to increase visibility on search engines.
How to Add Products to Shopify
Before selling a product, you must know how to add products to Shopify! Depending on your method, this can be time consuming when adding products to Shopify manually, but it is well worth the effort knowing how to add product to your store to showcase more products and get more sales.
Adding products manually is best if you are a beginner at creating a Shopify store since you have a few products to list. However, if your inventory of Shopify products grows, you must consider using tools that will help you save time when listing multiple products.
There are tools that enable you to import products from other ecommerce platforms.
Keep reading to learn more about how to add products to Shopify.
Step 1: Create a New Product
Once you have set up your Shopify account, it’s time to add your first product.
Go to the Shopify dashboard and choose Products on the left side of the page. Click Add Product to start adding the product details to your listing.
Step 2: Add Product Details
Adding product details to your Shopify online store is the most crucial step. You must include the most important details about the Shopify products. Hence, customers know exactly what to expect, helping them decide whether to purchase the product.
The first thing you must add is the product title. Keep the product title creative and descriptive of the actual product listed.
The idea is to give customers an idea of what the product is about based on the title alone.
The next thing you must add to the product listing on Shopify is the product descriptions. When writing the description, keep it unique and highlight the key features and benefits of the product.
Essentially, you must give your customers a reason to consider buying it! If there are unique features from other similar products, make sure to include that, too.
Consider the length when writing product descriptions. Keep it long enough to be substantial and informative but not too long to bore your customers.

Conduct keyword research before writing your product description. It will help you identify the best keywords to target when writing your description, optimizing your listing to include keywords that your target customers will likely search for when finding relevant products.
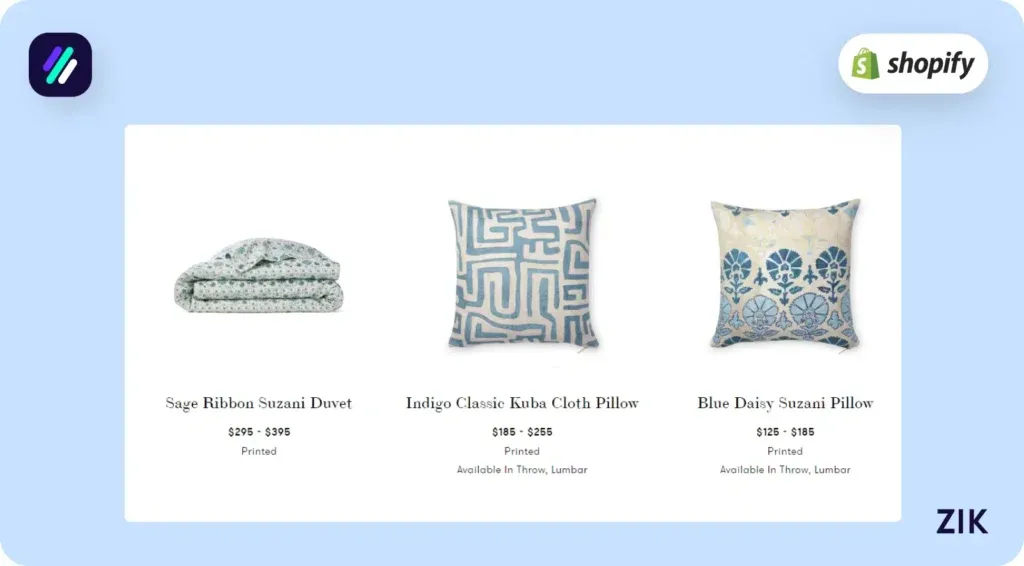
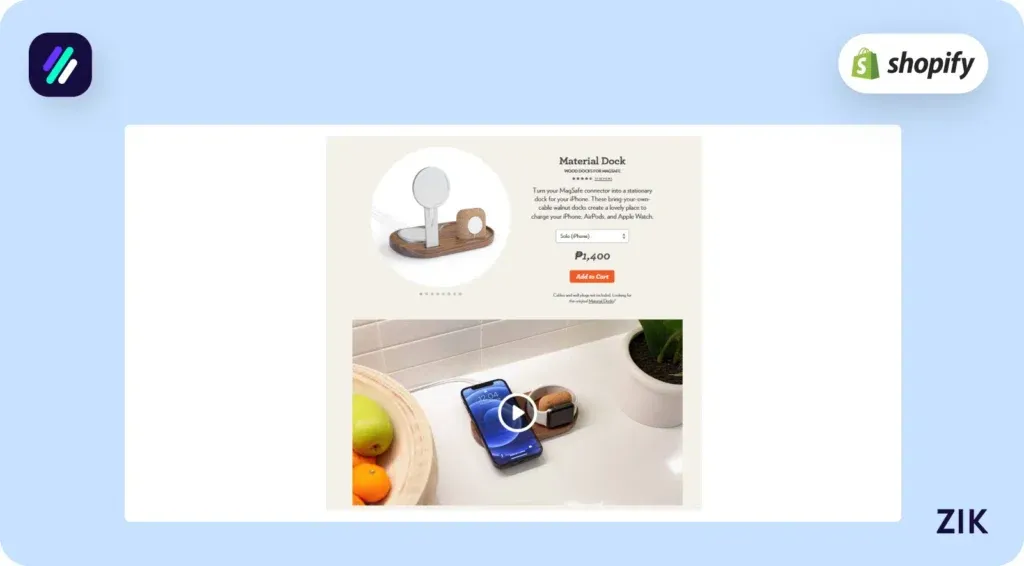
If you’re happy with the product title and description, add the media. Adding product photos is a must. Meanwhile, adding videos is optional but would be helpful to your listing.
Include as many product photos from various angles as possible. The video helps customers better understand the product than the photos can.
Giving customers a feel for your product is crucial, as they cannot physically examine it before buying.
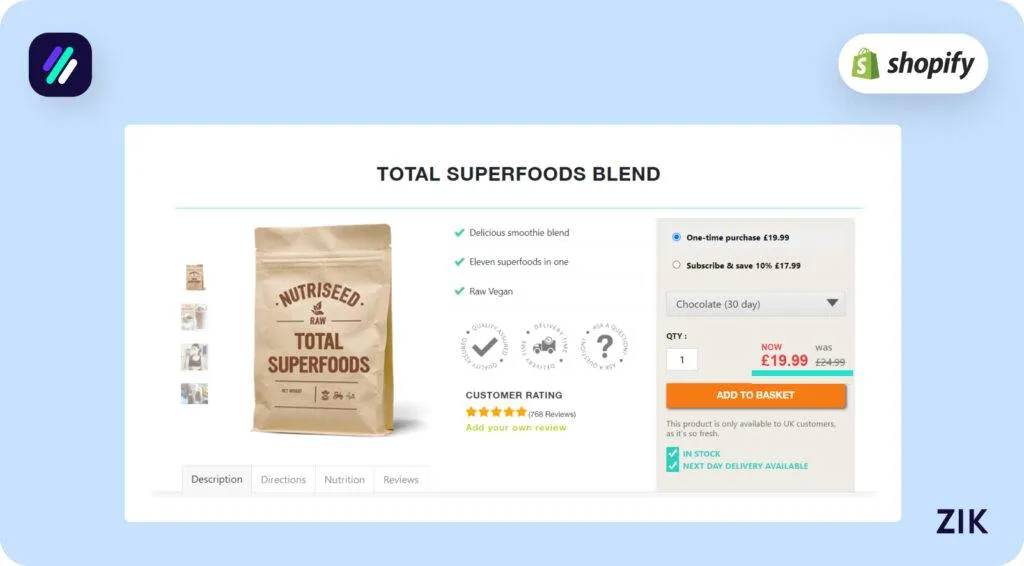
Step 3: Set the Product Price
Setting the price for your Shopify product is crucial to maximizing your listings. Consider two things when setting the product price: profitability and the product’s perceived value.
Profitability refers to how much profit you can earn for every product sold.
Meanwhile, the perceived value refers to how much your customers are willing to pay for a product. It could differ from the actual value of similar products in the market.
Simply put, you want to list your products for a price your customers can afford without losing money.
Therefore, you must perform a competitor analysis to determine how much other sellers are listing similar products for. Identify areas of differentiation for your products to help you set a competitive price.
When setting the price, you must fill out the actual price of the product you want to sell. You will also be asked to fill out the tax charges on your product.
You can set this so that the sales tax is automatically calculated and applied to the product. The tax charges on the product can be calculated based on the customer’s shipping location.
When listing the product, you will also be asked to fill out the cost per item. Shopify uses this data in the profit margin reports, but your customers won’t see this on the product listing.
Step 4: Add Categories and Sales Channels
You will see Product Organization on the right side of the Shopify admin dashboard. You must fill out four fields in this section to determine the correct product category.
The first one you must update is the Product Type. It refers to the specific product category when you add product details. You can assign one or more categories, whichever applies to your product.
Choosing the right category when you add products is crucial because it will help your customers find your products. If your product is in the wrong category, your customers won’t be able to see it.
Next is the Vendor, which refers to the manufacturer or brand of the product you’re selling. This information is crucial when you add product details to target brand-conscious customers or those with specific manufacturer preferences.
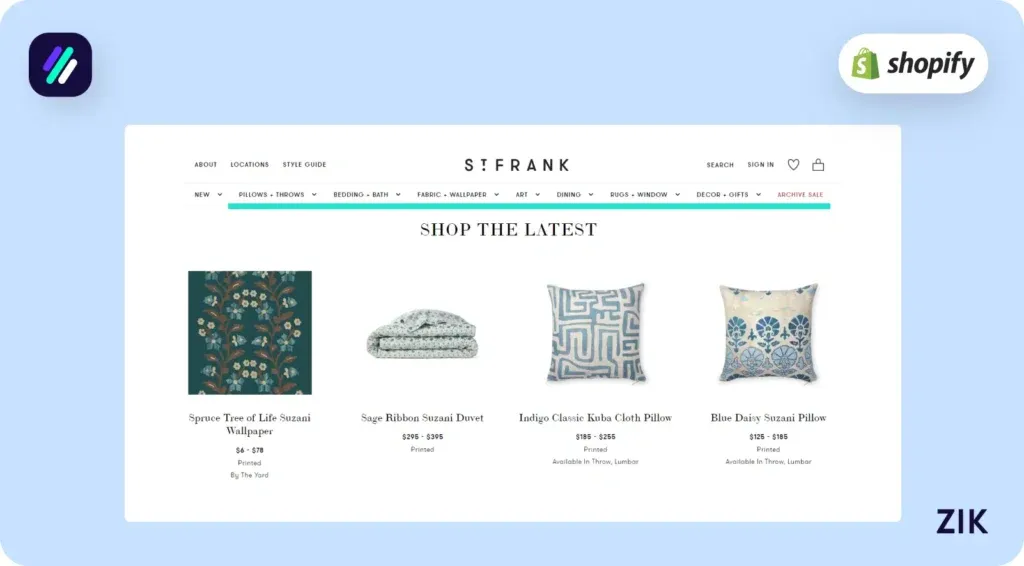
The third one is Collections, which refer to certain products grouped together. For example, you can create a collection for your Summer Sale.
This makes it easier for customers to navigate your Shopify store and find certain products. Using the example above, your customers can visit the Summer Sale category on your online store if they want to buy summer products.
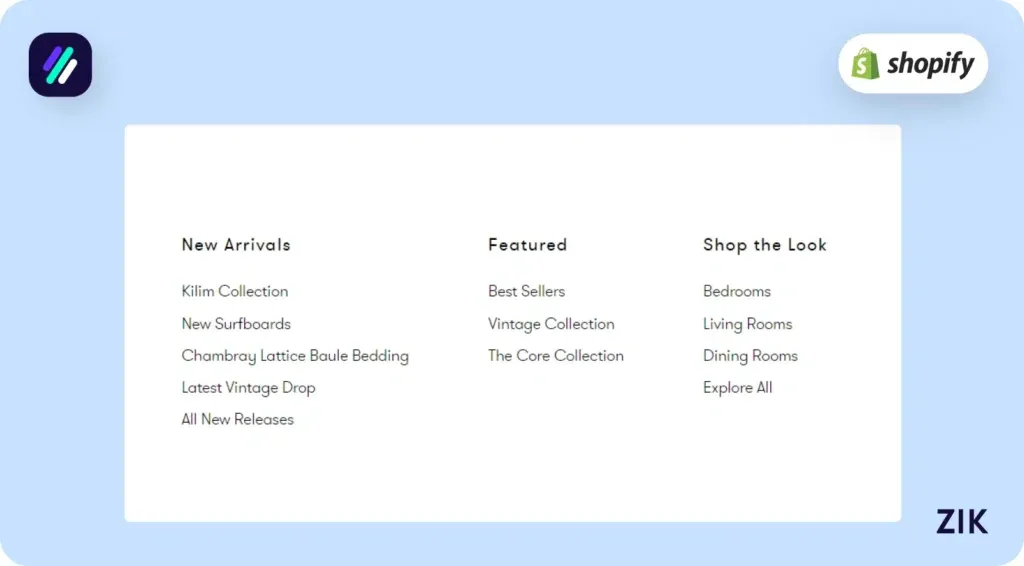
Finally, you can fill out the tags when you add products to Shopify. Tags are keywords relevant to the product listed, which can boost the search optimization results for your store or specific product listings.
They can also help organize products internally.
Next, you must choose which sales channels customers can use to find and buy your products. This requires an understanding of your target audience.
For example, if your target audience is millennials, you can add social media platforms like Facebook or Instagram as your sales channels.
Another thing to note is that you can choose specific markets within the Shopify Markets network if you sell outside the US. This makes it easier to sell globally and target customers from various countries.
Step 5: Manage Inventory
Adding a stock keeping unit (SKU) is vital for Shopify store owners to manage product inventory.
Once you’ve assigned the SKU, you must determine the product availability and if you wish to continue selling it if it sells out.
At this stage, you must also add product variants to your listing. Product variants are the color, size, material, or other details that distinguish products. Adding product variants also benefits your store, as customers have more options to suit their needs or buying preferences.
When you add the product variant, you must list the Price (as some products might be priced differently based on color or size options) and fill out the SKU and Barcode.
Download this eBook to jump start your dream Shopify business today!Step 6: Set Up Shipping
If you’re selling physical products, this step is vital to add products to Shopify. However, the process is different when you sell digital products.
Specify the shipping weight and location of the product when setting the shipping costs for each order. Shipping weight refers to the product’s total weight and the packaging before it is sent out to customers.
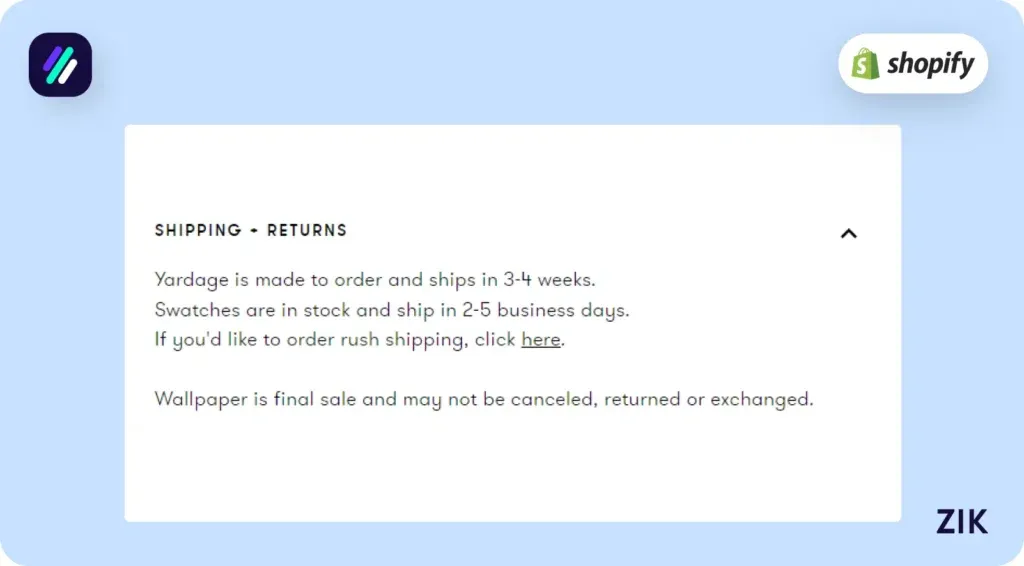
Next, specify the Country/Region of Origin. If you are selling or shipping the items from the US, you must specify the state of origin.
You must get the Harmonized System (HS) code, a globally recognized product classification system, from your government’s website. This numerical code makes it easier to track a product transported across international borders.
Step 7: SEO
Optimizing your product listing SEO is optional when you add your product page to Shopify. Still, it is absolutely necessary if you want your products to reach more customers.
When customers input a relevant search term, SEO improves your visibility on the Shopify search engine. You can manually edit the product fields optimized with targeted keywords or use an automated tool – it’s up to you.
When optimizing your product listing for SEO, focus on the title, the meta description, and the product description. You can also update the URL handle to make it more SEO-friendly and easy for humans to understand the listing.
Leverage SEO tools to optimize your performance for your product page within the platform and on Google.
Step 8: Publish and Sell
With all the information added to your listing, you can now hit publish and sell! Once you click the Publish button, the public can view your new products on your store.
Conclusion: How to Add Products to Shopify
You can add products to Shopify manually or import them via CSV file. Whether you choose the former or the latter depends on your store’s needs. Import products via CSV files when you add several products, but if you are new to your Shopify business, you can follow the steps provided here.
However, follow the best practices and recommendations provided here to help you maximize the reach of your product listings and earn more Shopify sales for your business!
Build and List with Shopify AI Store Builder
Want a faster way to launch and list your products? The Shopify AI store builder helps you add products to Shopify with optimized layouts, visuals, and pre-connected Shopify product research. Instead of spending hours on manual listing, AI handles the structure while you focus on your products.
Frequently Asked Questions on How to Add Products to Shopify
Here are some frequently asked questions on How to Add Products to Shopify
How do I add products to my Shopify page?
To add products, log into your Shopify admin, click Products > Add product, then enter details like title, description, price, and images. You can assign inventory, set shipping options, and publish immediately. Products also sync automatically if added through Shopify dropshipping apps or integrations.
How do I upload products to Shopify?
You can upload products individually by going to Products > Add product in your Shopify admin, or upload in bulk using a CSV file. Simply prepare your product data in Shopify’s CSV template, then import it to add multiple products at once efficiently.
How to add CJ dropshipping products to Shopify?
To add products, connect the CJdropshipping app to your Shopify store, browse CJ’s catalog, and click List on any item. Customize the title, images, description, and pricing, then publish. The product will automatically appear in your Shopify store, ready for customers to purchase.
How to connect products on Shopify?
You can connect products on Shopify by linking them through your sales channels and apps. In your admin, go to Products, select the item, and manage its availability across the online store, POS, or marketplaces. Apps like dropshipping or print-on-demand automatically sync product connections.
Why aren’t my Products showing up on Shopify?
Products may not appear if they’re set to draft instead of active, hidden from certain sales channels, or missing inventory. Check availability settings in the product page, ensure stock levels are correct, and verify they’re published to your online store channel.
How do I import listings from Amazon to Shopify?
You can import Amazon listings to Shopify using third-party apps like Codisto, CedCommerce, or LitCommerce, which sync product details, images, and inventory. After connecting accounts, select the listings you want to migrate, adjust descriptions or pricing, and publish them directly to your Shopify store.
How do you put your products on sale on Shopify?
To put products on sale, go to Products in your Shopify admin, select the item, and enter a lower value in the Compare at price field while keeping the current selling price. This shows the discount automatically and highlights the sale price in your store.
How do I add products to my Shopify collection?
To add products to a collection, go to Products > Collections in your Shopify admin, choose or create a collection, then manually select products or set up automated rules by tags, price, or vendor. Once saved, products appear under that collection in your store.
Can you post your own products on Shopify?
Yes, you can post your own products on Shopify by adding them manually in the admin panel. Simply upload photos, write descriptions, set prices, and manage inventory. Once published, your products will appear in your store, ready for customers to browse and purchase.