If you are looking for a fast, efficient, and reliable way to receive payments, many options are available. The world of finance offers many options for online sellers and remote workers to get paid and withdraw money online.
However, there are a few names that stand out in the industry.
PayPal has been at the forefront of the payment processing industry for years, but as more competition has emerged, there is one company has stood out the most – Payoneer.
As a Shopify store owner, you must know how to create a Payoneer account, as more people choose to send or receive money using this service. When I started online selling, I had limited options for receiving payments from customers.
This created some issues because many customers were limited by the options available, resulting in many lost sales. Thus, offering more payment methods to your customers could translate to higher sales as it simplifies their buying process.
This comprehensive guide will teach you how to create your Payoneer account and the benefits of setting it up. Let’s get started!
Key Takeaways
- Payoneer is a global payment processor that allows online sellers and freelancers to send and receive money from anywhere in the world.
- Adding Payoneer as a payment option to your store allows Payoneer users worldwide to send payments when they order online.
- Create an account via the Payoneer sign up page and provide the required information and documents.
- Upon submitting your application, your account is subject to review and approval.
What is Payoneer?
Payoneer is a financial services company based in New York. It specializes in offering fast online money transfer and digital payments, which is how it became popular, especially among freelancers and online sellers.
This service allows them to get paid internationally with ease—and fast!
It was once known as the best PayPal alternative, but more and more people, including online sellers, are choosing Payoneer as their payment method. When you create a Payoneer account, you will receive a free MasterCard.
It allows you to withdraw money from any ATM machine using your Payoneer MasterCard.
Since this payment method has grown in popularity, major companies, such as Amazon, Google, Fiverr, and AirBnB have used it.
Why Choose a Payoneer Account?
Before learning about the steps to create a Payoneer account, let’s discuss the benefits of having one and using this payment method for your Shopify business.
Global Reach
One of the main appeals of having a Payoneer account is the ability to receive payments from international clients and buyers. Using a Payoneer account for business-related payments means that you can reach global customers, expanding the reach and sales potential of your online business.
It supports over 150 currencies worldwide, so you can serve Payoneer customers from all over the world.
Various Payout Options
Aside from being able to serve other Payoneer customers globally, another advantage when you open a Payoneer account is that you can choose from many options for withdrawing money.
You can receive payments through bank transfers, free MasterCard withdrawals, receive local bank transfers, receiving accounts, and more. It offers added flexibility and convenience to receive money using your preferred method.
Fast Transactions
When processing payments online, it’s important to receive money fast. PayPal used to process payments for 2-3 business days, but they have greatly improved that to within 24 hours. But with a Payoneer account, you don’t have to wait that long.
Payoneer allows you to receive payment from your account and withdraw funds to your bank within hours. There is no need to wait for international clearing.
The service ensures fast fund transfers so you can get your money quickly. It’s a crucial feature in the fast-paced business landscape, allowing you to feel secure when receiving payments from Payoneer customers.
Low Transaction Fees
A major reason why many PayPal users have switched to Payoneer is the low transaction fee. Whereas PayPal customers frowned at its fees, you can expect competitive fees when you open a Payoneer account.
Their fees are even lower compared to traditional banking platforms.
Ease of Use
The intuitive and user-friendly platform at Payoneer makes it easy to navigate its features. You can manage transactions or open an account with a few simple steps, and there is no steep learning curve when using the website.
How to Create a Payoneer Account Step by Step Guide
Follow this create Payoneer account step by step guide so you can start using it as a payment method and receive digital payments with ease.
Step 1: Go to the Payoneer Registration Page
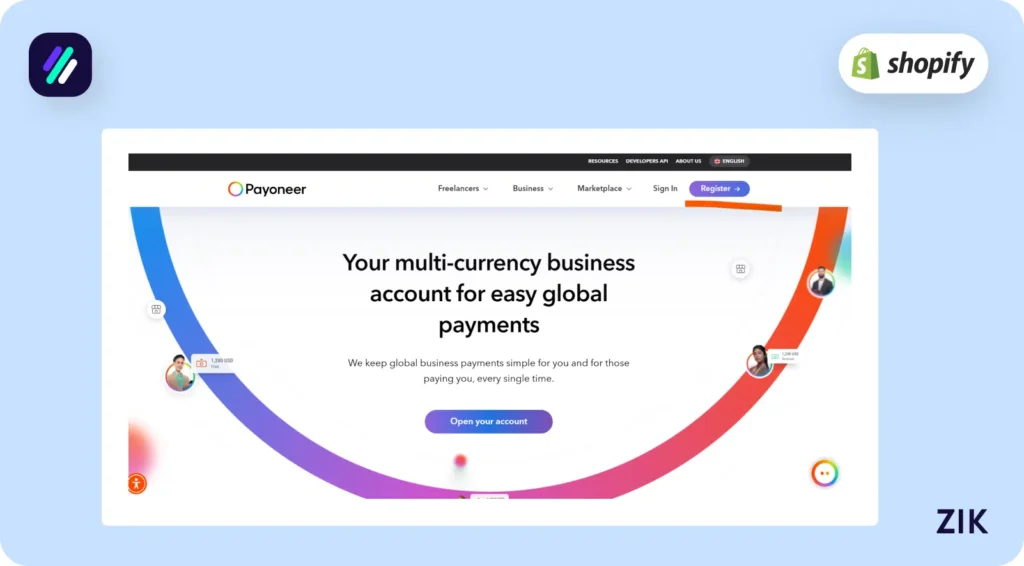
Go to the Payoneer website and click on the Register button at the top-right-hand corner of the page.
Another option is to click on the Open Your Account button on the home page.
Step 2: Choose your account type.
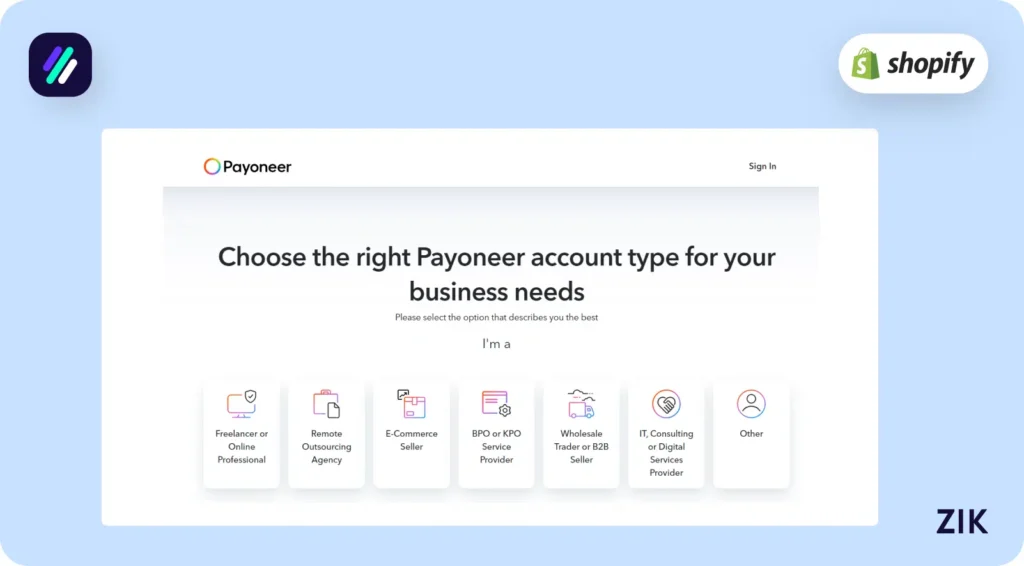
When you click on the link to register an account, you will be directed to a page that asks you to select the type of account you want to open.
Choose an account type that matches your business needs or purpose for opening the Payoneer account.
For Shopify online sellers, choose “E-Commerce Seller.”
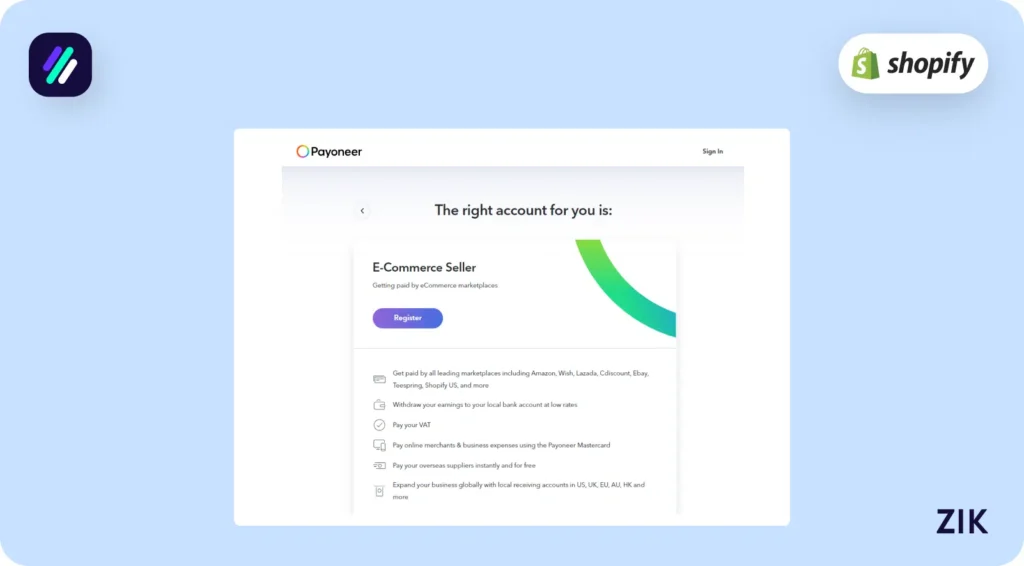
Step 3: Fill out the necessary information.
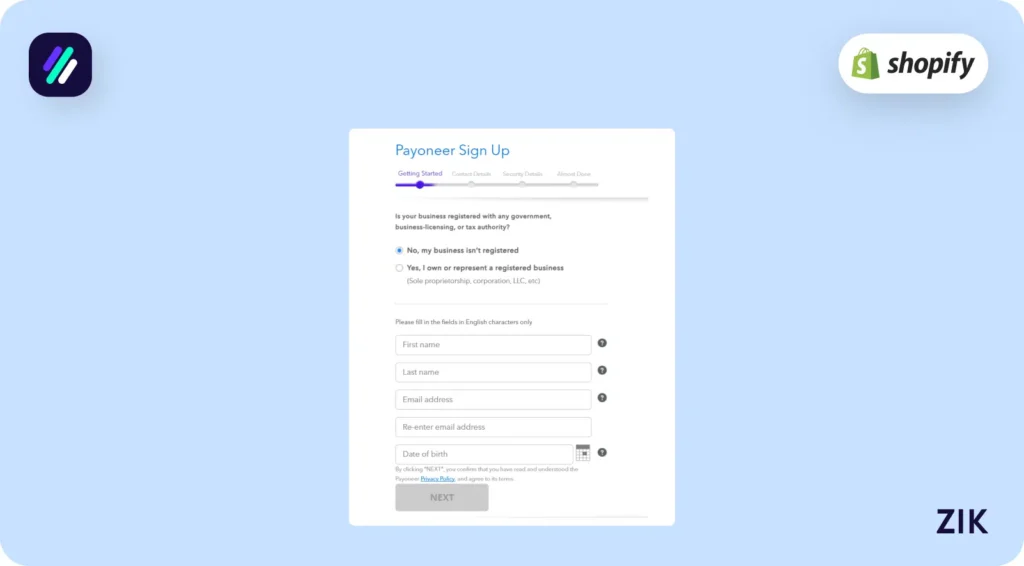
Next, you will answer more questions to set up your Payoneer account.
The next step will ask you to select the estimated amount of business-related payments you expect to receive monthly. A few options are provided, and you select the range that applies to you.
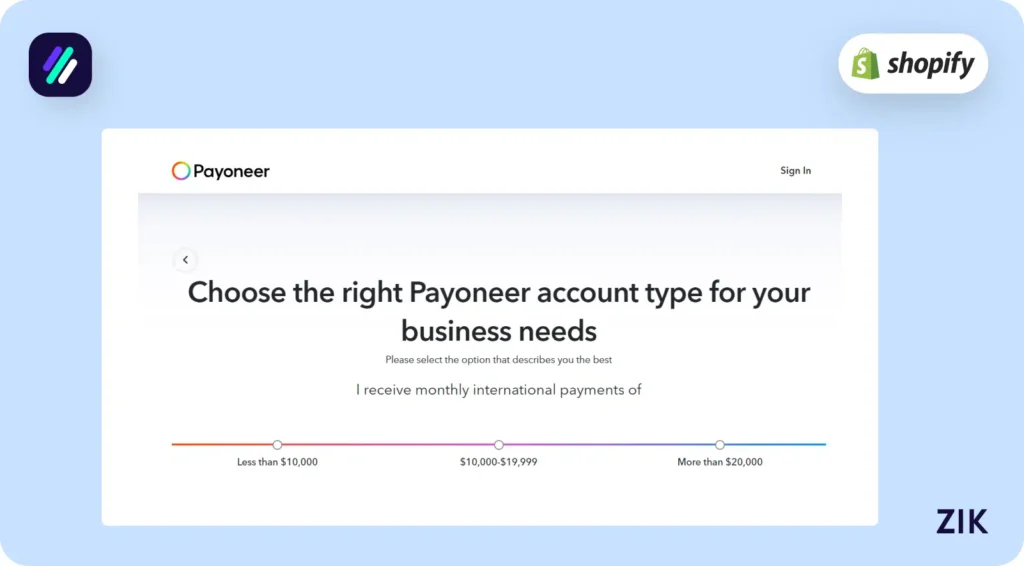
At the next step, Payoneer will recommend an account type based on your answers to the questions from the previous pages. You will get an overview of the features you can access in your account.
Step 4: Continue the sign up process.
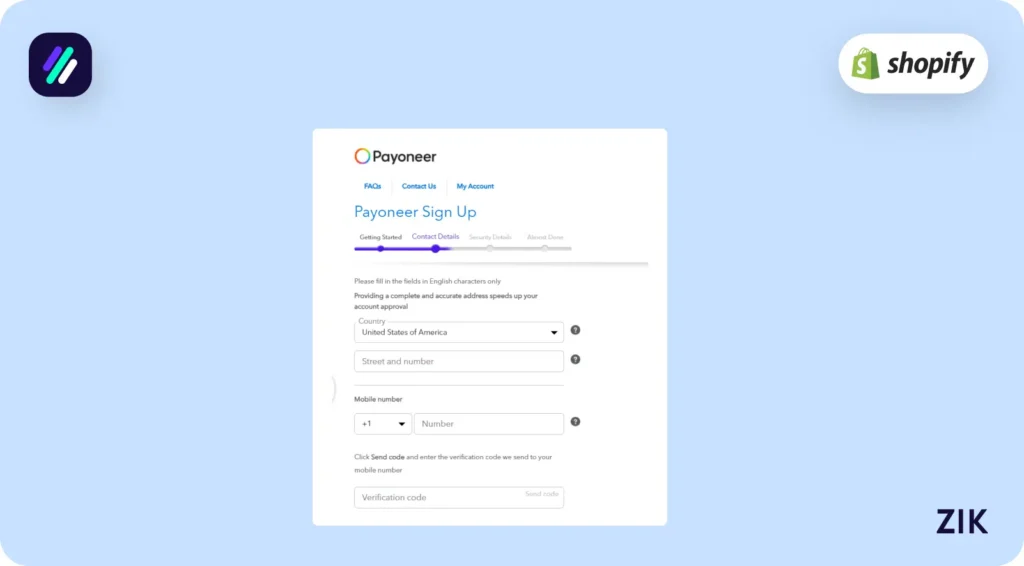
Click Register, and you will proceed with the rest of the setup process for your account.
This page requires you to provide information about yourself and your business. Provide the required information for the specified fields.
You will be asked to provide your contact and security details to ensure limited access to your account.
Step 5: Verify your identity and provide bank information.
You will be asked to provide IDs and other documents to verify your identity. Make sure to supply the required documents to complete the verification process.
When opening an account with Payoneer, you must present an ID card. You will also be asked for your bank account details, which must be the same name as the ID card. Upon verification, your residential address, email address, and phone number will also be required.
On the Security Details page, you must enter a strong password. Keep this password on file when you need to access your account. You will also select a security question you must answer if you cannot log into your account.
On the Bank Information page, you must enter your bank name and account information (account holder name and number). If you have completed this section, click Agree and submit the information.
Step 6: Wait for approval.
Once you have successfully submitted your personal and security information, you will receive an email asking you to verify your email address and another stating that your application is under review. You will find a link to verify your email address when you open this email.
Once you have verified your email, you will receive a confirmation that the registration is complete. The confirmation email provides instructions on how to access your Payoneer account.
Step 7: Access your Payoneer account.
Log into your Payoneer account using the email and password you provided during registration.
It takes at least one business day to finish the setup of your account, but it can take up to five business days.
Reasons Why Your Payoneer Registration Failed
If you haven’t received an email approval for your account after five business days, contact support directly to inquire about your account status.
There are several reasons why your account application was not approved, such as the following:
- You have an existing account—Every user is only allowed one Payoneer account, so you cannot open a new one if you have an existing one.
- You entered the wrong information (or insufficient information) – You must provide your real address and personal information, as it will be verified against the documents provided.
- Your country is restricted – Payoneer is available in over 200 countries. If unapproved, it could be that Payoneer is not yet available in your country.
- You have an existing Payoneer account that was blocked – You cannot proceed with your registration if you had an old Payoneer account that violated the site’s terms and conditions.
Congratulations! Your Payoneer account is now set up and ready to be used as a payment method for your online business.
Pros to Use Payoneer
- Receive payment fast
- Multi-currency support for up to 200 countries
- Send and receive payment
- No extra fees for international transactions
- No need for a bank account to open an account
- Mobile app for easy and convenient transfers
- Free global payments when sending payments from one Payoneer account to another
- Access to 24/7 support
Cons to Use Payoneer
- Currency conversion rate is 2-2.75%
- High conversion rates for non-listed currencies
- High income threshold for opening account
- Extensive signup process with lots of documents required
Is Payoneer Better Than Paypal?
It’s impossible not to compare Payoneer and PayPal, as these two are among the most popular options for receiving payments online, especially internationally.
The best way to choose is to look at their features for a thorough comparison.
The first consideration is the exchange rate since it will determine how much payments you can receive in various currencies. Expect to pay more if you have to convert currencies for each transaction.
With PayPal, there is a charge of up to 4% for the exchange rate, even if it’s converting the currency to transfer the amount to your bank account.
Payoneer has a more affordable exchange rate of 2%. Thus, it is better suited for international clients or those receiving payments in different currencies.
In addition, Payoneer’s multi-currency capabilities are better than PayPal’s. The latter accepts up to 26 currencies, but Payoneer can process up to 150.
Transaction processing time is another important area to consider, and Payoneer is a clear winner. PayPal’s payment processing time can take up to three business days, whereas Payoneer only takes one to two business days.
And with Payoneer’s flexible fee system, you can save when transacting between two accounts.
For online business owners, it is important to offer more than one payment method. Ideally, you should include PayPal and Payoneer as a payment method for your Shopify store, especially if you sell globally.
These two payment methods ensure you can get orders from PayPal and Payoneer customers worldwide. The easier it is for your customers to pay, the better it is for your business’s bottom line.
Final Thoughts: Use Payoneer for Your Shopify Store
When you use Payoneer for your online business, you can unlock your international sales potential, especially since you can receive your money without using PayPal on eBay. Whether you open a Payoneer account for its fast transactions or lower fees, you can leverage these benefits to take your business to the next level.
With more efficiency and reliability in processing payments, you can focus on scaling your business while ensuring you get paid on time and enjoy more profits!
Get Paid Faster with Global Orders
Once you’ve created your Payoneer account, use the ZIK eBay product research tool to find high-demand global products and boost your sales. Identify trends, discover winning items, and list products that attract international buyers who prefer paying with Payoneer. Start your free 7-day trial and grow your eBay business today.
Frequently Asked Questions on How to Create a Payooner Account
Here are some frequently asked questions about creating a Payoneer account:
Is Payoneer free to use?
Payoneer is free to sign up for and maintain, but not all services are free. You can receive payments at no cost from other Payoneer users, while currency conversions, ATM withdrawals, and certain transfers may include fees depending on the transaction type.
Do I need a bank account for Payoneer?
No, you don’t always need a bank account just to open a Payoneer account. But to withdraw your Payoneer balance into your country’s currency (or to your local bank), you will need to link a bank account.
Can anyone have a Payoneer account?
Yes, anyone over 18 with a valid government ID can apply for a Payoneer account. It must be used for legitimate business purposes such as freelancing, e-commerce, or services. Accounts linked to restricted industries like gambling or adult content are not allowed.
How much is the Payoneer fee?
If you send payments to Payoneer using your credit or debit card, the transaction fee is 1-3%, depending on the transaction amount. The fees differ for recurring payments. This one will be 2%, and you can send payments for up to 200 bank accounts.
What do you need to open a Payoneer account?
To register an account with Payoneer, you must provide your personal and financial information. You will be asked to provide your full name, address, phone number, and other contact details. You must submit a government-issued ID or ID card to verify your identity. Additional documents might be required depending on which account type you choose, whether for individual or business use.
How to receive funds through Payoneer?
If you have created your account, you can link Payoneer to your account or store to receive payments from Payoneer customers when they order. Depending on the client’s payment option, such as debit or credit card, the funds will be in your account within a day or two.


