Dropshipping has caught your eye, and you cannot wait to get started.
But building a website from scratch requires a bit of know-how that does not come naturally to everyone, and that is not exactly a secret.
There is no need to worry, though, as this guide covers it all step by step.
I will walk you through the process on how to create a dropshipping website and share the tools you can use along the way to build a store that is ready to sell.
Step 1: Choose the Right Website Builder for Dropshipping
Building a dropshipping store starts with choosing the right website builder. There are several options out there, but not all of them are built with dropshipping in mind.
I’ve reviewed the most popular options across five key criteria and assigned each a score of 1 to 5 based on how well they perform for dropshipping.
| Criteria | Weight | What It Measures |
| Dropshipping App Ecosystem | 25% | How many supplier integrations (DSers, Spocket, CJ, etc.) are natively available |
| Ease of Setup | 20% | Time from signup to a live, sellable store for someone with no coding background |
| Conversion Infrastructure | 25% | Built-in checkout optimization, abandoned cart recovery, upsell capability |
| SEO and Marketing Tools | 15% | Blog functionality, meta tag control, email marketing, social selling integrations |
| Total Cost of Ownership at Scale | 15% | Monthly fees plus app costs plus transaction fees at 100+ orders per month |
Some of the best dropshipping website builders are:
ZIK’s AI Shopify Builder
Best for: Beginners who want a professional Shopify store without having to learn design or coding
Score: 4.7/5
ZIK Analytics’ AI store builder cuts the time it takes to launch a store from 40 hours down to under 10 minutes. It pre-fills your store with winning products from a database of over 54 million analyzed items, enabling you to start testing and dropshipping quickly.
The tradeoff is that this tool is built exclusively for Shopify. If you want to create stores on WordPress or Wix, you will need to find another tool.
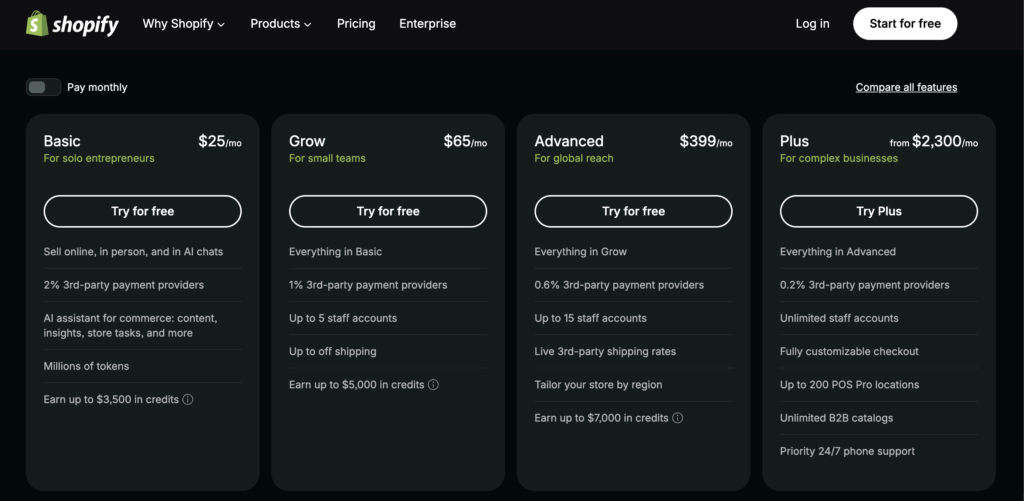
Shopify
Best for: Founders who want to spend zero time on building and 100% of their time on selling.
Score: 4.7/5
Shopify is a popular e-commerce solution that handles hosting, security, and payment processing out of the box. It offers a seamless checkout experience and built-in AI tools that simplify store management. Shopify also lets you get started for as little as $1 a month for the first three months, making it a low-risk option for new dropshippers.
The downside of using Shopify for a dropshipping store is that costs can spiral quickly if you rely on multiple app subscriptions for basic features. It also has a hard limit of 100 variants per product, and using an external payment gateway instead of Shopify Payments will cost you an extra 0.5 to 2% on every sale.
Furthermore, you will need some technical expertise to get it up and running.
Related: How to Sell on Shopify
Webflow
Best for: Entrepreneurs who want their store to look premium and are willing to put in extra time on design to get there
Score: 4.2/5
Webflow is a visual design tool that gives you control over every layout and animation without writing code. It is ideal for sellers who want their store to look like a premium brand rather than a generic dropshipping site. Webflow’s clean code also means you get faster load times and a better SEO configuration out of the box.
The tradeoff is that Webflow is not built with dropshipping in mind. It lacks the one-click import tools Shopify has, the learning curve is steep, and once you go beyond 500 products, the backend starts to feel clunky.
Additionally, while the features are getting better for eCommerce, they’re still not as comprehensive as Shopify is.
WordPress+WooCommerce
Best for: People who want full ownership of their store and avoid hefty transaction fees.
Score: 4.5/5
WooCommerce is a free plugin that turns a WordPress site into a dropshipping store. It does not charge transaction fees on sales and supports unlimited product variations. The integration with WordPress also means you get access to powerful SEO and blogging tools that are hard to match on other platforms.
The downside is that you are on your own more than with other platforms. There is no customer support line if something breaks, and managing hosting and security falls entirely on you.
Wix
Best for: Beginners who want creative freedom and a good-looking store without dealing with complex setups.
Score: 4.4/5
Wix is a drag-and-drop builder that lets you place any element anywhere on a page without touching code. Its AI tools can generate a full storefront with SEO-optimized descriptions in under three minutes, and it charges zero transaction fees on sales.
The tradeoff is that the creative freedom can work against you. Too many animations and high-res images will slow your site down. It also lacks the app ecosystem and inventory management tools you would need if you plan to scale big.
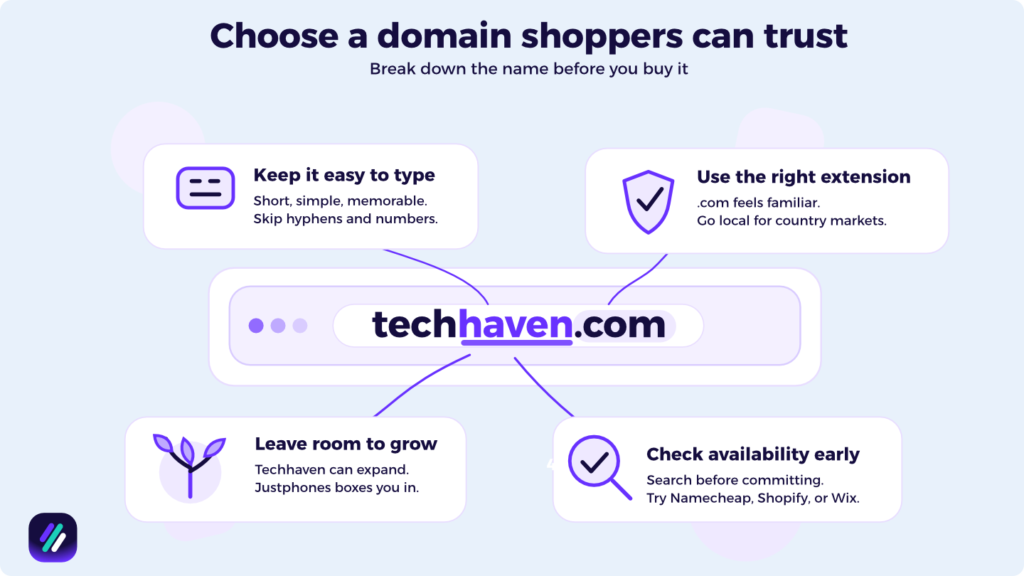
Step 2: Register Your Domain Name
Once you’ve chosen a dropshipping website builder, the next step is to register a domain name for your store.
The domain is your store’s address on the internet. Every store needs one, and the name you pick influences how customers see your brand from the first click.
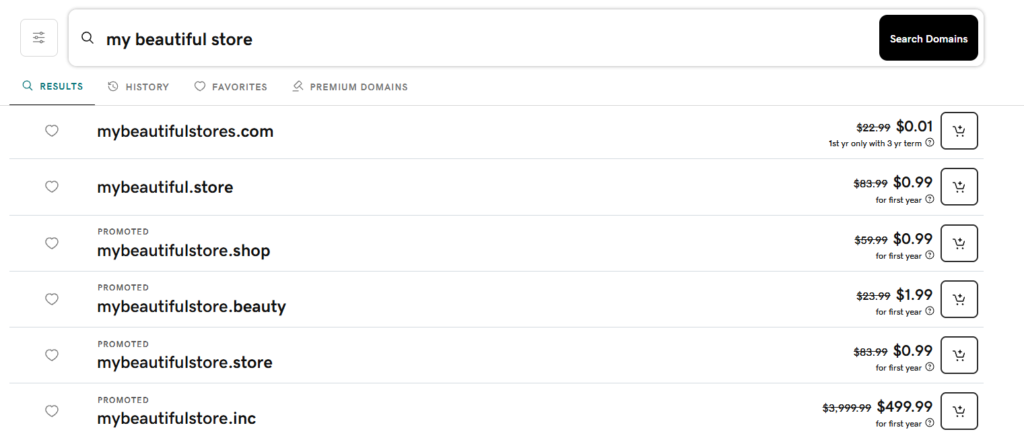
Here’s what to keep in mind:
- Choose the right extension. .com is the most popular and the one most shoppers trust by default, but you can also go with .co or .store if your ideal .com is taken. If you plan to dropship in the UK or target a specific country, use the local extension like .co.uk or .ca instead.
- Keep the name short and easy to spell. Make sure the domain you choose is simple enough that anyone can type it from memory. Avoid hyphens, numbers, and anything that sounds like two words jammed together.
- Choose a name that enables you to grow. If you plan to expand your dropshipping niche later, avoid choosing a name that is too narrow. For example, if you want to get started selling phones but later add accessories and cases, a name like techhaven.com would be a better fit than something narrow like justphones.com.
- Check availability early. Other businesses or domain squatters already take many domain names. To make sure you are not wasting time, check for availability via Namecheap or directly through Shopify or Wix before you get attached to a name.
Pro tip: Check whether your registrar includes free WHOIS privacy. Without it, your personal contact details become publicly visible to anyone who looks up your domain.
Choosing a domain, I believe, could be a later step, as it depends on the best dropshipping products you want to sell.
Step 3: Configure Hosting for Your Store
When your domain is set up, you can start looking for a hosting provider for your store.
If you chose an all-in-one option like Shopify or Wix, this won’t be needed as hosting is already included in your plan.
But if you chose something like WooCommerce, you need to sort hosting separately. Companies like Hostinger and SiteGround offer something called managed WordPress hosting, where they handle server maintenance on your behalf.
When choosing a host, make sure to:
- Check for SSL inclusion. Every legitimate host includes a free SSL certificate. This is what puts the padlock in your browser bar and stops customers from seeing a “Not Secure” warning when they land on your store.
- Choose a server location close to your customers. For example, if you plan to sell to shoppers in Germany, pick a host with a German data center so your pages load faster for them.
- Connect your store to a CDN. A content delivery network like Cloudflare helps your site load quickly for visitors anywhere in the world. Most managed hosting plans include CDN integration, but it is worth checking before you sign up so you are not paying for it separately.
Step 4: Design Your Store and Build Your Brand Identity
If you have ever landed on a store and immediately felt like you could trust it, you probably know the importance of good design.
Good design builds trust, and that trust is what turns visitors into paying customers, simple as that.
As someone building their first website, the design does not need to be perfect from day one, as you can start with a clean, simple layout and improve it over time as you learn what your customers respond to.
Top essential pages to build for your site:
- Homepage: This is the first page most visitors land on. Make sure it communicates what you sell and why customers should trust you within the first few seconds.
- Collection pages: These pages organize your products into categories, making it easy for customers to find what they are looking for. Using Shopify’s smart collections, you can set up and sort categories by tags, which improves the shopping experience significantly.
- Product pages: These are some of the most important pages on any ecommerce site. Optimizing them requires high-quality images and short benefit-driven descriptions, making sure the add to cart button is visible without scrolling.
- About us page: What is the story behind your store? People want to know who they are buying from. A short, honest about us page builds the kind of connection that generic stores never manage.
- Contact page: Let people know how to reach you. A simple email address or contact form is enough to make your store look legitimate.
Overall, there are not so many pages you need to build at first. Of course, as you will want to grow and expand, more pages will be needed.
Step 5: Find Winning Dropshipping Products in Your Niche
With the design done and your store set up, you can now focus on finding products to sell.
Ideally, you should look for items that already have a track record of selling, as these are products with proven demand behind them and ones that bring buyers in without needing a huge marketing budget to get started.
There are a few ways to find winning items:
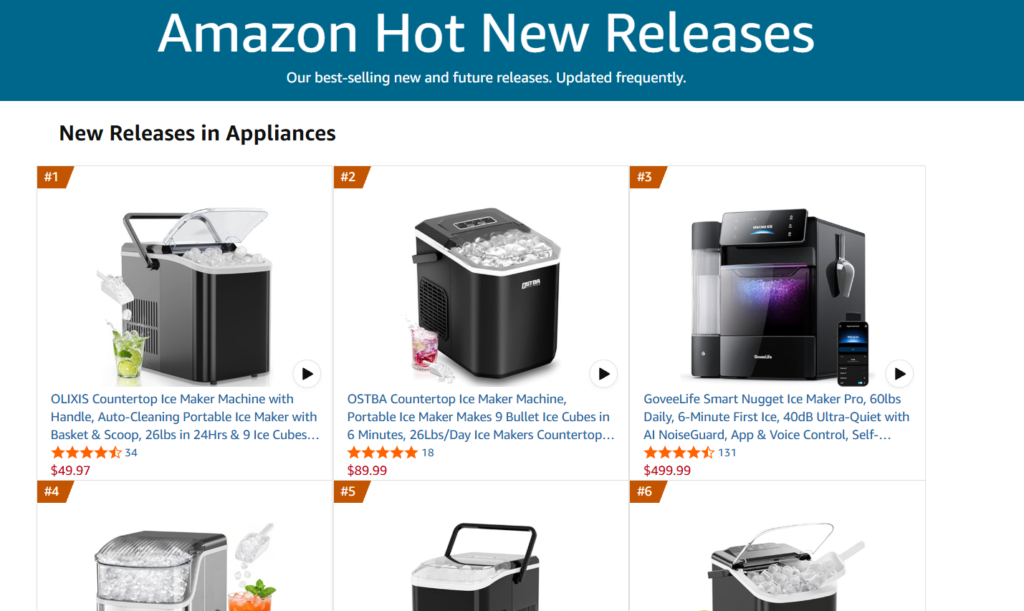
- Amazon and eBay: Marketplaces like Amazon and eBay have dedicated pages that show you what is trending in real time. For example, Amazon’s Hot New Releases page shows products that have seen the biggest jump in sales in the last 24 hours. Likewise, eBay’s trending section gives you a live look at what buyers are actively purchasing.
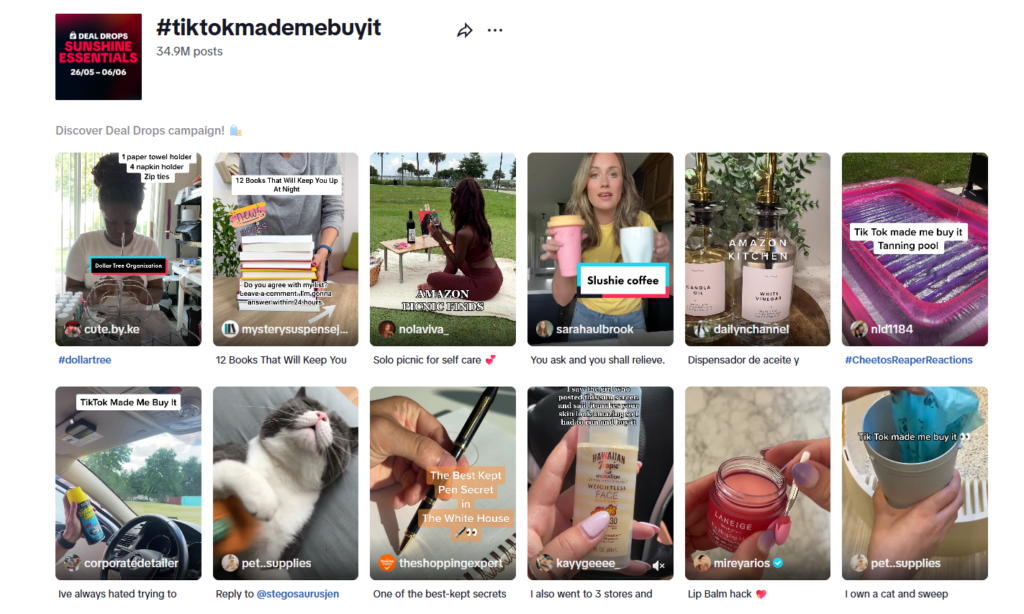
- Social media trends: Social media trends can give you an early insight into what products are about to take off. Hashtags such as #TikTokMadeMeBuyIt are a good way to spot what people are already buying and talking about.
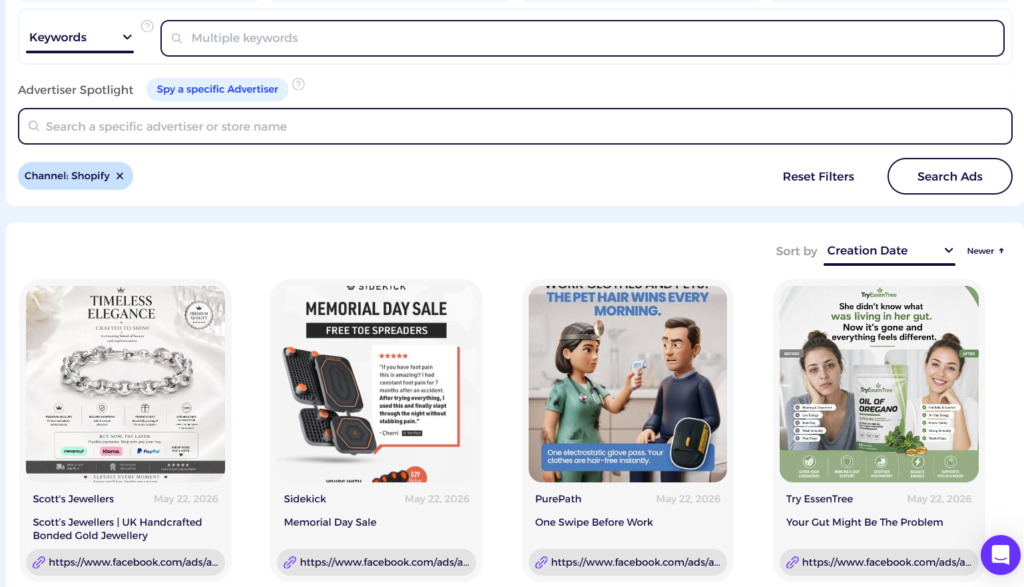
- Ad library: Facebook’s ad library is a goldmine for product ideas. Advertisers mostly run ads for products that bring them returns. ZIK also offers an ad spy tool that lets you filter by engagement and ad duration to find proven winners faster.
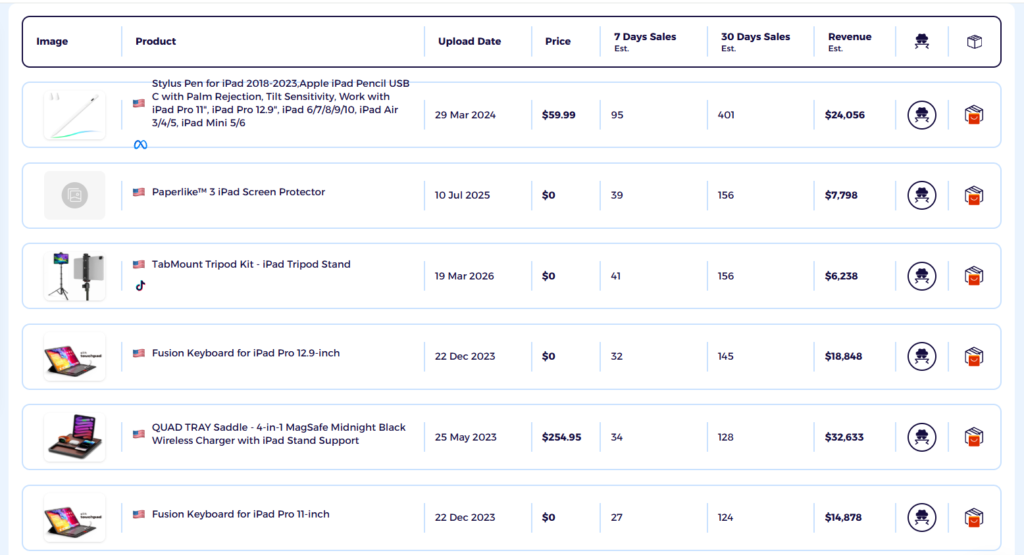
- Shopify product research tool: Tools such as ZIK offer the Shopify Product Explorer and Shopify Store Finder that show you exactly what is selling and how well. You can also use the Item Finder to match products with suppliers and calculate your profit margin before you list anything.
Step 6: Connect a Dropshipping Supplier and Import Products
This is where your website becomes a fully functional store. The process involves finding a dropshipping supplier and importing the products you found in the previous step or manually importing them into your store.
Typically, this is done via apps that connect your store directly to your supplier. Apps like DSers and CJ Dropshipping offer one-click functionality that pulls products, images, and pricing straight into your store.
Once you are set up, you can start building out your catalog:
- Write your own titles and descriptions. Make sure each product has its own description based on what your target customer actually cares about. Using the ones provided by the manufacturer is a bad idea, as they are often poorly translated and get flagged by search engines for duplicate content.
- Compress your images. Large images slow your store down. Use a tool like TinyPNG to reduce file sizes without losing quality. Lifestyle images showing the product in use tend to convert better than plain product shots.
- Set your prices using the cost-plus margin method. Don’t forget to factor in your supplier’s shipping cost and app fees on top of the product price. ZIK’s supplier matching tool automates this step by calculating your potential profit margin automatically based on the product you sell.
Step 7: Configure Payments, Shipping, and Taxes
Once you have a few products to sell, consider setting up payments and shipping to make it easy for customers to buy from your store.
There are a few different things to configure:
Payment gateways
Companies like Stripe and PayPal offer gateways where customers can pay securely using a credit card or their PayPal account. Platforms like Shopify also offer their own payment solution and integrate with most third-party gateways.
Offering multiple options helps since shoppers are more likely to complete a purchase when their preferred payment method is available.
Related read: How to Create a Payoneer Account
Shipping configuration
If you have ever abandoned a cart because of a surprise shipping fee, you know how powerful free shipping can be. Setting a free shipping threshold lets you build the cost into your product price, and you can also set up shipping zones to control which regions you deliver to and be upfront about how long orders will take to arrive
Tax setup
Tax is a part and parcel of running any store. But it does not have to be complicated. With tools like Shopify Tax and TaxJar, you can calculate sales tax, VAT, or GST automatically at checkout based on where your customer is located, keeping you compliant as you grow.
Step 8: Set up Analytics, Conversion Tracking, & Speed Optimization
Only setting up a store and hoping for the best is not how successful dropshippers operate. To make sure your store is actually making money, you need to look at the data and make decisions based on what it tells you.
Doing this requires tracking tools such as the Meta Pixel and TikTok Pixel. These show you which ads are driving purchases and which products are worth putting more budget behind.
You can set all of this up through official apps on Shopify without touching any code. At a minimum, you will want:
- Google Analytics 4: This shows you where your traffic is coming from and how visitors move through your store.
- Meta Pixel: This tracks which Facebook and Instagram ads lead to actual purchases and feeds that data back to Meta so it can find more buyers like your existing customers.
- TikTok Pixel: For those running TikTok ads, the TikTok Pixel does the same on that platform.
- Google Tag Manager: This is a tool helping you to implement all the pixels in one interface and improves your overall page speed, which is important for SEO.
Plus, keep an eye on your store’s speed. According to research, sites that load in one second convert at three times the rate of those that take five seconds. Compress your product images and limit the apps you install to keep things fast.
How Much Does It Cost to Build a Dropshipping Website?
As of today, it costs anywhere between $300 and $8,000 to build and launch a dropshipping store.
The startup expense can vary based on the tools and approach you opt to use. For example, hiring a professional designer can increase costs significantly, whereas using a free tool like Canva or AI for mockups for the same job can help keep things lean.
Let me break down what to expect:
| Expense | Cost Range | Why You Need It |
| Domain Name | $10 – $20/year | Your website needs an address that customers can type to reach you and remember. |
| Platform/Hosting | $29 – $105/month | Gives you everything you need to build and manage your store, from product listings to checkout. |
| Theme/Template | $0 – $350 | If you want your store to look professional and trustworthy, a good theme makes that possible without needing a designer. |
| Product Research Tool | $0 – $60/month | Helps you find products that sell before you spend time and money listing them. |
| Essential Tools | $0 – $50/month | Handles order fulfillment automatically so you can focus on growth. |
| Marketing | $300 – $3,000+/month | Brings customers to your store. Without it, no one knows you exist. |
Additional cost of marketing
You can also mix and match dropshipping marketing strategies depending on your budget:
| Strategy | Recommended Starting Budget | Expected ROI |
| Meta Ads | $500 – $1,500/month | High targeting, best for conversions |
| TikTok Ads | $300 – $500 to exit learning phase | Best for impulse buys and viral growth |
| Google Ads | $1.00-$4.00+ per click (Need at least 20/day) | Best for high-intent shoppers |
| SEO & AI | $500-$2,000 (mostly time investment) | Slow burn but compounds over time |
| Social Media Posting | $0-$100 (mostly time investment | Works well paired with paid ads |
Total cost
To give you a clearer picture, here is what three months of running a dropshipping store through a Shopify plan looks like across different budget levels:
| Approach | Total 3-Month Cost | What It Covers |
| Ultra-Lean | $300 – $600 | A basic Shopify plan, a free theme, and organic marketing only |
| Realistic Beginner | $1,000 – $2,500 | A paid Shopify plan, a premium theme, and around $1,500 set aside for ad testing |
| Serious Launch | $3,000 – $6,000+ | A full store setup with automation tools and $2,000 or more allocated to marketing |
Keep in mind that most beginners break even or lose money in the first two to three months while testing products, and that is completely normal. The goal early on is to find what works and build from there.
Related read: How to Start Dropshipping with No Money
Build Your Dropshipping Store and Find Winning Products with ZIK Analytics
ZIK Analytics has a suite of tools to help you build your dropshipping store and find products that generate sales.
However, I want to highlight three tools that make store setup and product research easier:
- Shopify AI store builder helps you set up your dropshipping store faster by automating store design and product page creation. Tell it which niche you’re targeting, and it creates banners and a homepage based on your selection.
- Shopify Product Explorer is your dropshipping product research tool for finding which products are selling across Shopify stores. Search keywords and filter by sales to identify trending items with strong demand.
- AdSpy shows you which ads competitors are running on Facebook and Instagram. Search keywords to see engagement metrics and save winning ads to reference when creating your own campaigns.
You can also use the Shopify Sales Tracker to monitor successful stores and the Shopify Store Finder to discover dropshipping stores by revenue and marketing channels.
Get your ZIK Analytics trial today and start building your dropshipping store with tools designed for product research and validation
How to Create a Dropshipping Website FAQs
In this section, I’ll answer the questions people frequently ask about creating a dropshipping website.
Can I create my own website for dropshipping?
Yes, you can create your own website for dropshipping. Popular platforms like Shopify and Wix allow you to build a custom store and connect it with dropshipping suppliers to import different items. The drag and drop functionality inside these platforms allows you to design your store your way and add various elements to improve the user experience.
Can I create a dropshipping website for free?
You can create a dropshipping website for free using platforms like Wix, Printify, or Webador. Once set up, you can keep costs at zero by using free supplier platforms like EPROLO or Printify and driving traffic through organic channels like TikTok and SEO.
Do I need coding skills to build a dropshipping website?
No, you do not need coding skills to build a functional dropshipping website. No-code website builders have made it possible to create an online store using pre-built templates. Apps can also be used to handle tasks like product importing and order fulfillment, meaning the whole thing can be set up without knowing CSS or HTML.